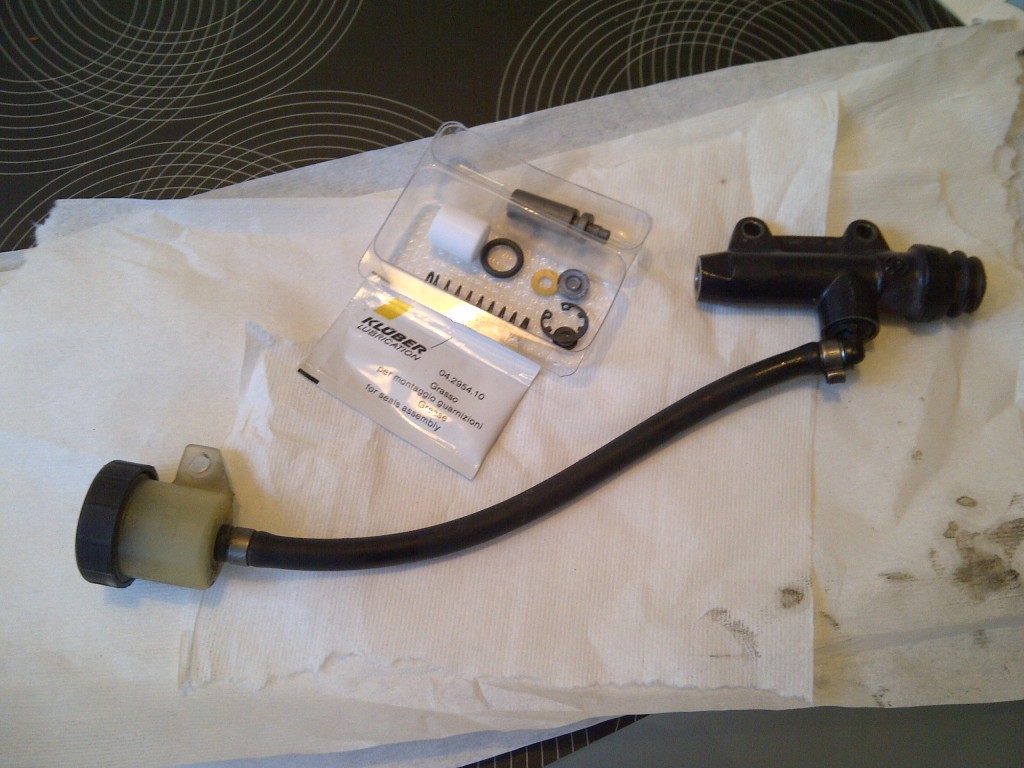
The 11mm Brembo master cylinder fitted to the rear braking system on many Aprilia, BMW, and KTM motorcycles is a weak point, to put it mildly. Regardless, it is fixable. See below for how and why.
0. Tools required
Inside circlip pliers
10mm socket
5mm hex drive
2mm long drift (10cm) or 2mm Allen wrench
Tack hammer
Long-nose pliers
Flat-head screwdriver
Dental picks
Dremel with small round cutting bit
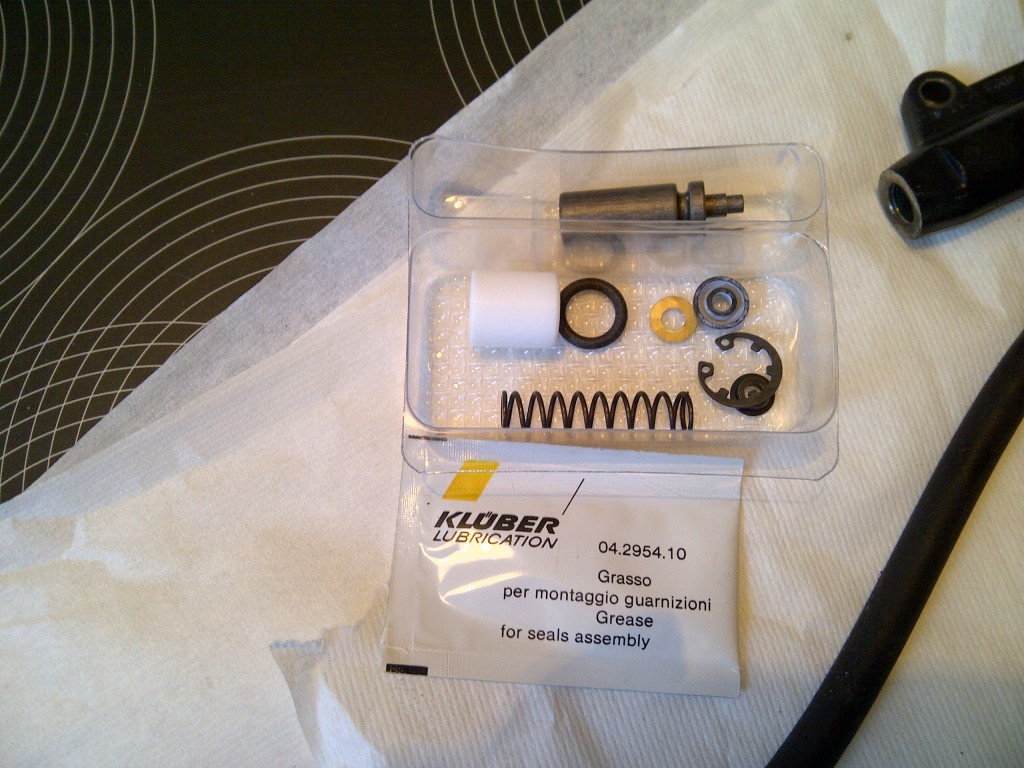
One full rebuild kit from Brembo, part number 110.4362.41
1. Remove the master cylinder from the bike. To do this, remove the bolt holding the brake fluid reservoir and washer with a 10mm socket. Return the bolt and washer to the hole to insure they are not lost. Drain the reservoir and replace the lid and gasket. Release the brake line fitting from the top of the master cylinder and back it out entirely. Remove the two bolts securing the MC to the bike using a 5mm hex drive. Lift the MC away from the bike, clearing the brake line at the top. The push rod will slide out of the rubber boot at the bottom with a slight tug. Return the two hex screws to the bike for safekeeping.
2. Retire to somewhere warm (or cool…), you might be there for a while. Bring the MC with you. Spread some paper towels or other protection out, and drain the master cylinder fully. Set aside the rebuild kit for later.
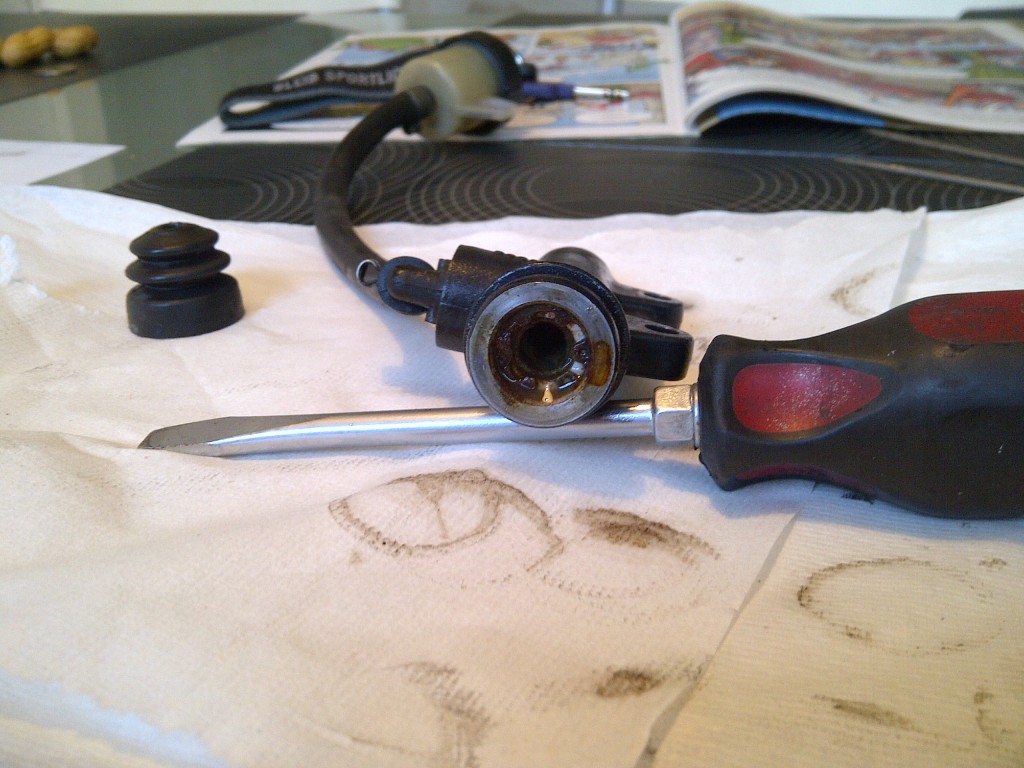
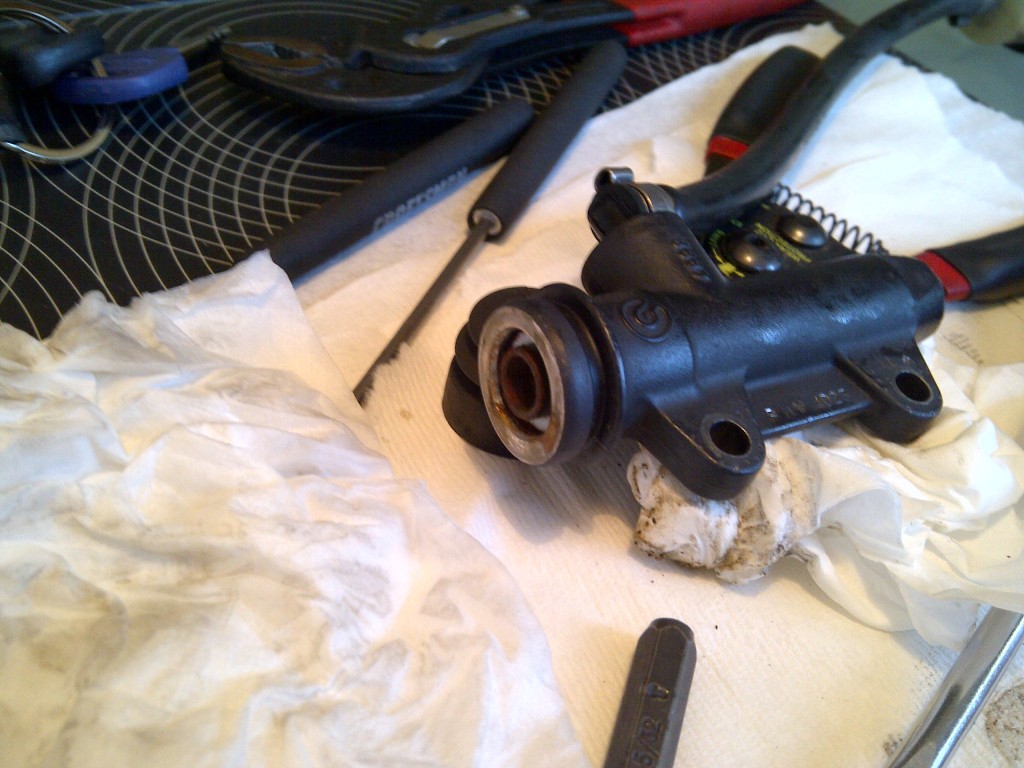
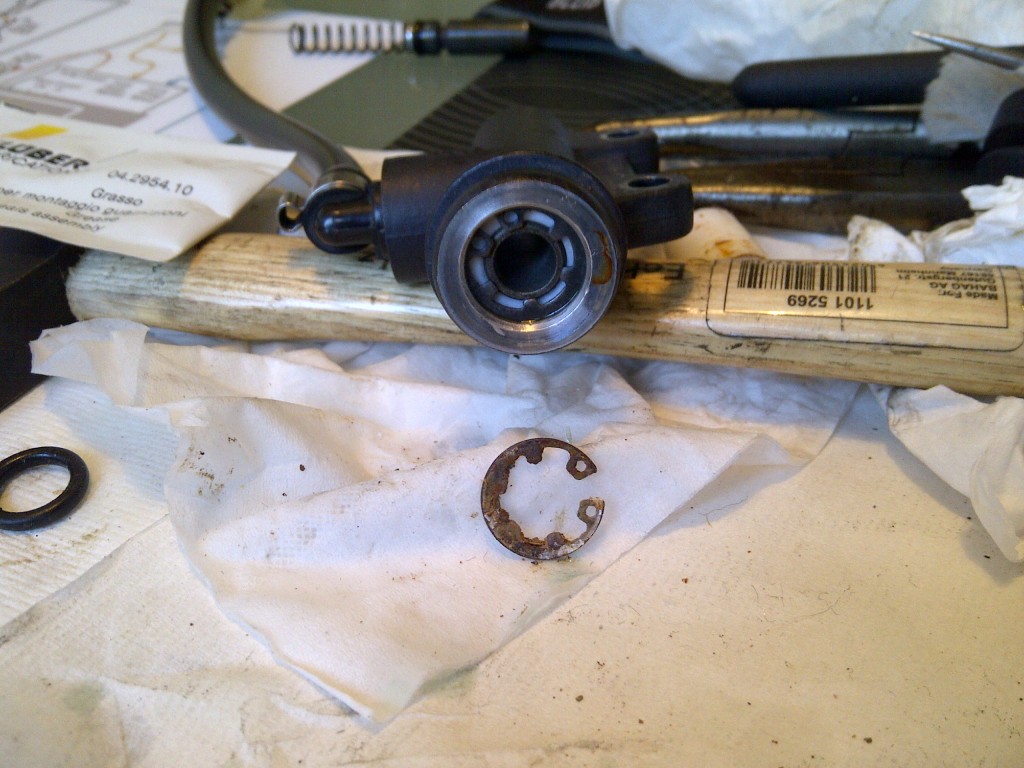
3. Carefully examine the MC. Remove the rubber boot by tugging at it gently. To help it, insert a flat screwdriver into the groove at the base of the MC and gently prise the boot away. Looking down the bore of the MC, you will see the piston at the center, a white spacer surrounding the piston, and a circlip holding it all together. The circlip may be rusty, if it is, you have some work on your hands. See below for a good (bad) example of a rusty circlip.
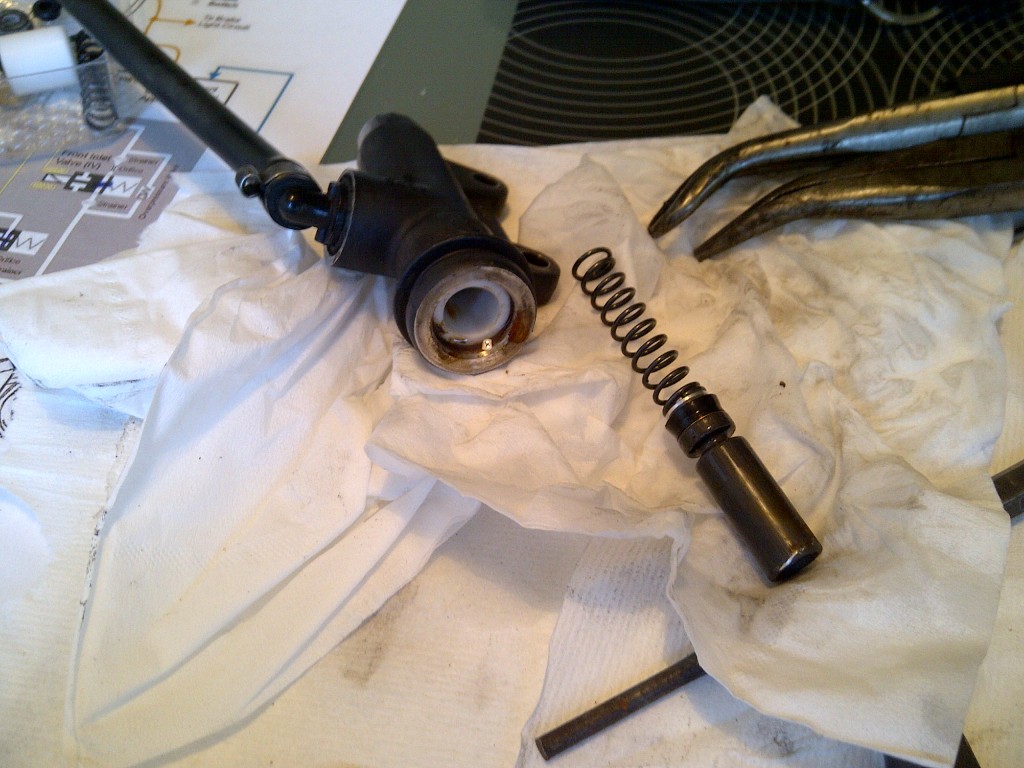
4. Remove the circlip using inside ring removing pliers. If the piston is stuck, use a long 2mm drift or a 2mm Allen wrench to drive it out from the top side. Tap the drift or the Allen key gently with a tack hammer, checking the other end for progress occasionally. When approximately 4mm of piston are exposed, gently grab the piston with long nose pliers and slide it out. This will all require some effort. The spring and spring seat will also come out at this time, or can be shaken out gently. Examine the piston for corrosion and clean it.
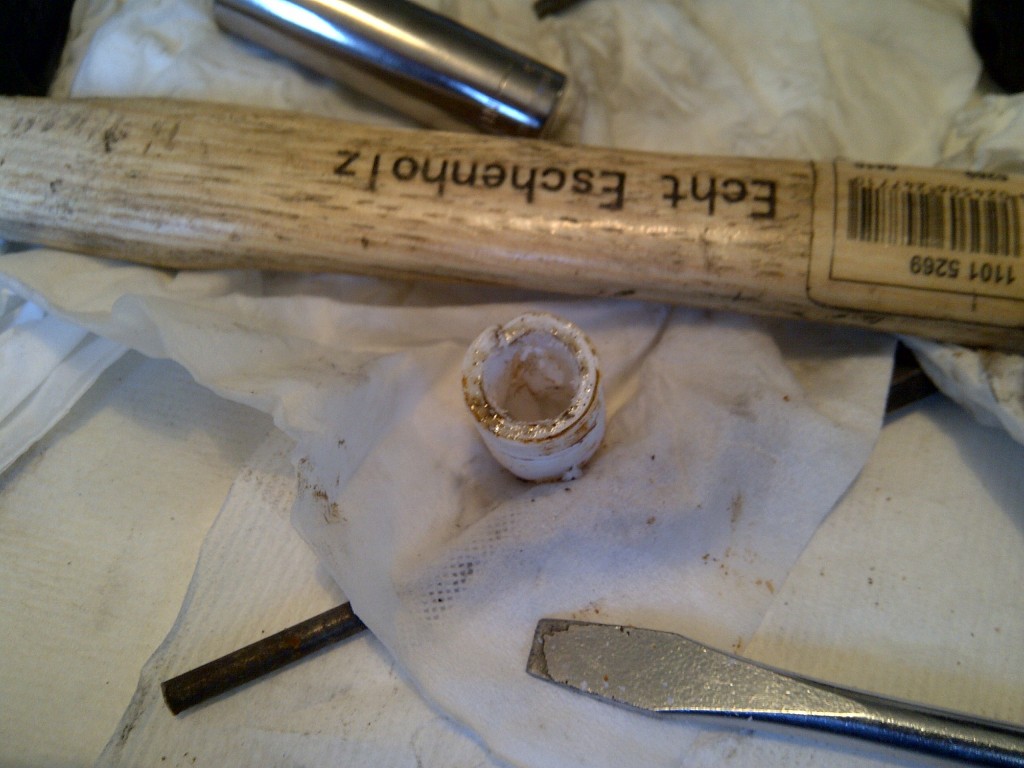
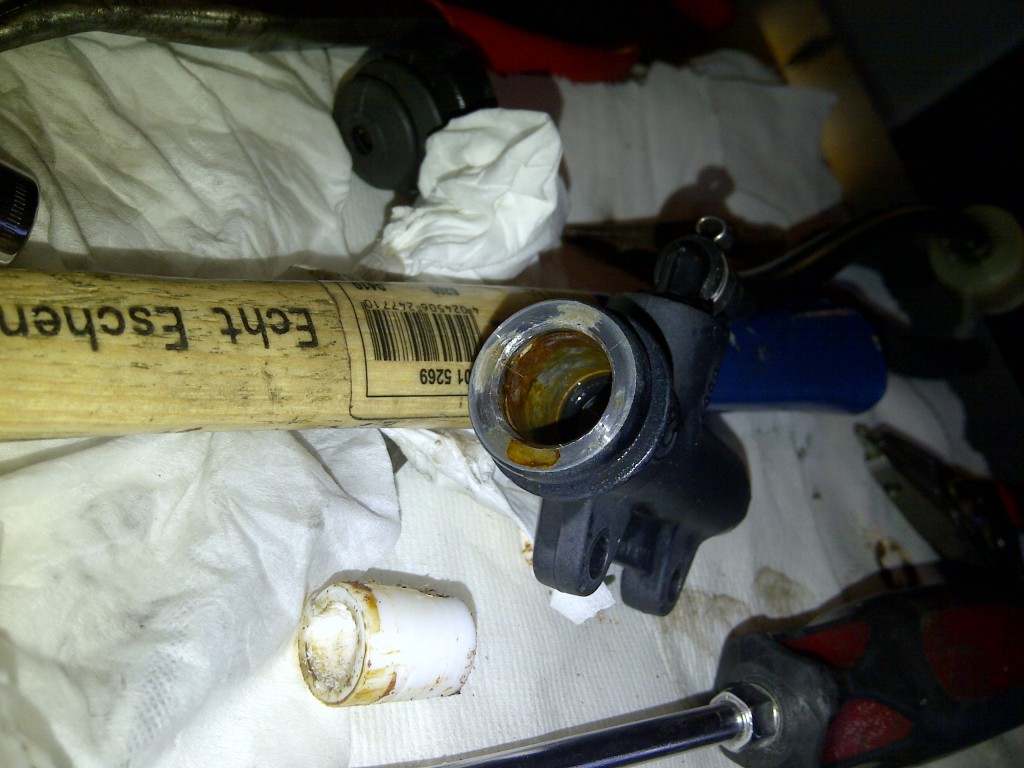
5. Now for the fun. The white sleeve may not slide out willingly. If it did, you would not likely be attempting this repair. A rather easy way to remove the sleeve is to grind or cut a groove in it. I used a 2mm ball-shaped cutting bit on my Dremel and ground out two channels, one the full length of the sleeve. Using the circlip pliers, twist the sleeve in the MC body and slowly work it out. Another way to remove the sleeve is to turn the bits of a 90° circlip tool to the outside and use it as a puller. In either case, take care not to damage the surface of the bore. It is not a sealing surface, but smooth is very important to the cylinder staying functional for any length of time. After removing the white sleeve, remove the o-ring that is still in the bore.
6. Once the white sleeve is removed, you will have to clean the inside of the outer bore where the sleeve was sitting. If the circlip was rusty, you will likely also find rust inside of the bore. Using Scotchbrite, steel wool, or very fine sandpaper, remove the red rust from the bore. Clean the bore to remove the residue from this round of cleaning.
7. This step is critical to determining whether the MC is going to be repairable for any length of time. After the red rust is removed, use a pick to investigate the condition of the outer bore. If you have tiny fingers, they will work, too. Now, you are looking for corrosion of the aluminium cylinder body. This is the corrosion that is causing the piston to stick, not the red rust. Using a pick, gently flake away any aluminium oxide that has built up in the bore. Under the oxide will be pits. There is no getting around this. Fortunately, these pits do not interfere with the operation of the cylinder if they are properly treated prior to reassembly. This process is slow and time-consuming, but will pay off in the end. When you have removed the fluffy stuff, carefully clean the entire MC and the reservoir and feed line. Blow them out well with clean water and air, and dry thoroughly.
8. When you have removed the aluminium oxide from the bore, it is time to open up the rebuild kit and start putting things back together. Remove the white sleeve from the kit and test fit it to the bore. It should float smoothly in the bore with only very slight resistance to turning or sliding. This indicates that the bore is free of oxide. Remove the white sleeve, and coat the inside of the bore with Loctite Silver or Heavy Duty (black) antiseize. Do not use copper-based antiseize! This coating should be very very light. Coat the new o-ring with brake assembly grease (HMW polyoxyethylene, supplied in the kit) and insert it into the bore. Insert the white sleeve and twist it gently in the bore. Assemble the spring to its spring seat, and slide the spring into the bore. Coat the piston and seal with brake assembly grease and insert them into the bore. The piston will stick out a bit.
9. To finish the assembly, fit the new circlip to the inside circlip pliers. Secure the master cylinder body and hold the circlip over the piston. Using a suitable drift, inserted through the center of the circlip, depress the piston into the MC, and secure the circlip. Treat the circlip with a drop of wicking grade low-strength threadlocker and, using a pick, draw the threadlocker around the circlip to coat it evenly.
10. Bench bleed the MC and install it to the motorbike, in reverse order of removal. Fully bleed the braking system, including at least one ABS activation in the middle of the process.
Conclusion: The boot on the MC is poorly designed and encourages water to enter the space within the boot. Basically, the boot should be inserted into the MC, not sitting on the outside. This moisture leads to corrosion of the circlip. However, corrosion of the circlip is not the reason the whole thing fails, it is just part of a chain reaction of fail. Once the iron starts to go, it triggers a galvanic reaction in the aluminium and the aluminium begins to corrode. The problem is that aluminium oxide is fluffy. Very fluffy. And very incompressibly crystalline. This increase in volume puts pressure on the white sleeve and eventually causes the piston to bind.
My fix: Forget grease. It won’t hold up. Use a heavy duty anti-seize product like Loctite Silver or Heavy Duty (black) to fill the void between the sleeve and bore, and then coat the circlip with low-strength (green) wicking threadlocker, which is commonly used as an anti-corrosive coating on automotive fasteners. If you are in Aviation and have access to Alodine 1424 or the like, a coating of this on the inside of the sleeve bore (along with overnight drying) will also go a long way to preventing repeat performances.

