Style

Naturally, there was a spreadsheet involved.
My goal was to max out reliability and moderate cost.
I looked at a new FA20 short block, but the passenger side head was compromised. Then I thought FA20 long block, but that was basically good money after bad. I never complained about the torque dip as I rarely spent any time in it, but this just seemed like a MEH idea. Whole used engine, nope, because it would be just another ticking time bomb with me driving it. I also thought about doing an FA22 (FA24 short block/FA20 heads), but machine shop time…. too much stress. So also no.

Then an FA24 with 15K on it showed up. Hello and nice to meet you. Thank you to the friend who linked me to it!

The total for the swap is not small money, but it is also not big money, considering what engine swaps can cost you. The main thing is that you can run the FA24 on the FA20 ECU and wiring harness. This is a very non-trivial savings!

Engine – $6K
Assorted fasteners and gaskets (dealer/Amazon) – $150
Verus ECU bracket – $70
Hachi harness bits – $200
Tomei Joint Pipe – $235

I’ve also gone ahead and pre-ordered the Formula Delta oil pan as I do track the little beastie. If I end up paying for tuning, figure another $400 for that. I also upgraded to the Verus Forged clutch fork. If one person was the rock star here, it was the shipping clerk at Verus. They were on it – both orders shipped silly fast.

I usually make my own connectors, but I’m glad I ordered the Hachi bits. Very nicely made, labeled professionally, and I got to support a tiny aftermarket dude who uses the Farmington Hills font. If you are local to SE Michigan, you know what I am talking about.

The decision to upgrade the exhaust joint pipe came after discussion with a colleague who has experience in that sort of thing (Detroit peeps rock. Seriously). Rather than fool with the manifold (I did get a Tomei UEL catless with the engine) and risk fitment issues with the Formula Delta pan, I opted to go for a stock manifold. The factory exhaust manifold has a cat which is considerably larger than the FA20 unit, so good there, but the FA20 joint pipe (right after the cat) is … not big … and is a known bottleneck in the exhaust. The Tomei unit is straight through 60mm, over the 54mm weirdly internally shaped stock one. That will mitigate any downstream issues. It drones pretty badly at idle with the stock one, hopefully that goes away because it is BAD.

I kept the FA20 AC compressor (never unhooked it, just bolted it back to the FA24 which avoided refrigerant loss) and the FA20 alternator and bracket. The AC compressor rear mounting buss was there and threaded, just unused. The alternator bracket is not going anywhere with only three of four bolts in it.

The swap was the lowest drama swap I’ve ever done aside from a dead-factory one. That includes several VW swaps Mk1-Mk4, where there is no Body Control Module to deal with. Honestly, it was as easy as a stock Mk1 swap. There was literally nothing to do except forget to plug in the High Pressure Fuel Pump and wonder why it wasn’t running well. Once that was done, it fired up and went into idle calibration perfectly. If I help with another car, I think I could do this in a weekend, possibly even in a single day. If I subtract the teardown of the FA20 and my missed points (the clutch fork needs to be all the way on the ball mount, HPFP connector, missing hardware, yadda yadda…), it could definitely be done in a longish day.

I’ll be tuning with an OpenFlashPerformance tool with support from a friend who actually knows what they are doing to get it on the road safely.

Yes, you can buy horsepower. I guess I have to make a new sticker. No more torque dip.

After 111502 miles and 40+ track days, the FA20 in the BRZ had it. No complaints here. I was coming off at 3 at Grattan after the last session of the day and about 100 feet from the paddock, new, unhappy noises happened. Thankfully, amongst the Summer Track Days crew of regulars, an unneeded trailer was available and my blueberry was hauled home safely. Otherwise, it was a really good day at Grattan, steadily dropping lap times and improving my line. The new pavement is interesting, and there are some elevation changes to the track that I was surprised by. But a good day at Grattan is better than the best day at most other tracks, so there is that.

I have a lot of mixed feelings about the failure. I got more than 100K out of the engine, which is good considering some of the stories I have heard about this engine. On the plus side, it failed in a perfectly safe place where I could stop it before it ate the crank, and surrounded by friends who aren’t strangers to racecars doing racecar things.

Getting to the oil pan was no easy feat – it’s captive to the exhaust manifold so that had to come out. That was not a particularly fun job and of course involved a Sawzall (last spring bolt, nothing serious). The oil pan is now out and it’s not a happy place. Lots of glitter, made of the souls of big end bearings. And before you say “RTV in the pickup”, no, there was no RTV in the pickup to speak of.

I am spending the July 4th weekend having at it, and am deep into the engine bay with some help from my older son. I have to kick his latest 4AGE build off the engine stand to put this one on it. Poor kid.

I will hopefully have it out by Sunday night and then can spend next week tearing it down to find the bad bearing. If the crank is ok, I will button it all back up and it will be back to doing FA20 things. If there is cylinder damage, well, I have a friend who is a bad influence and thinks I should put an FA24 in it….

This time, it’s an MF Ghost Angel. I used the Tokyo Auto Salon version because I’m not accepting enough of my own body to wear a mini-bikini bottom. So skirt it is.
Teaser pic of my small purse accessory. Two phones and a small wallet. Also, I hate making gloves. They are awful. But I am getting better at them.

Some time back (lol) someone asked me if I was “time-blind”. Lovely pejorative, huh? I thought first about how ridiculous of a question that was, and then thought about it for a while more and realized that there is more than one way to perceive time, and neuro-diverse (ND) people seem to be prone to it.

Let’s go there.

The traditional perception of time is based on the clock or calendar. I will call this clock-based time or calendar-based time. It is focused on units of duration – how long something takes to happen or do or whatever. A meeting is one hour long. A week is seven days long. A car trip is seven hours. Going to college is four years. And so on. The world basically runs this way. Neurotypical (NT) people generally run this way.

ND people are often found to be less focused on duration – we can become engaged in topics and lose track of clock-based time, frustrating those around us. This does not mean we are “time blind”, it means that we perceive time differently than those who perceive clock-based time and the durations that characterize it. Time either happens or does not happen for us. That’s why an ND person may tell you something is happening “tomorrow” and mean next month. “Tomorrow” in this case is the next time that whatever is going on will happen again.

This standard thinking of time as limited to standard units of duration such as hours and months is insufficient and inconsistent for people like myself. Instead of perceiving time in units of duration, we perceive it in units of events. Each event has a start and finish. I have three event states – not started, in progress, and finished. For example, when someone asks me how long a task will take, it is hard for me to estimate. Instead of hours, I see the task in terms of steps that have to be linked up and completed. I call this type of time event-based time to differentiate it from calendar-based time or clock-based time. Keeping event-based time is part of the systemizing skill group.

The value of event-based time is best demonstrated when laying out a Gantt chart. Durations are important, but without the correct linking of task starts and finishes, the chart is meaningless and adds no value to the project plan. This is the area where event-based time people excel – lining up things so the work gets done in the correct order and the overall task completes on time.

Next time you want to call someone “time-blind”, please take a step back and ask yourself if they instead run on event-based time. Once the architecture of event-based time is established, the event-based person can start to plan for better recognizing clock-based time and the clock-based time person can start to recognize the value the event-based time thinker brings to the table.

Hopefully, we can retire the pejorative “time-blind” in the near future.

Maille

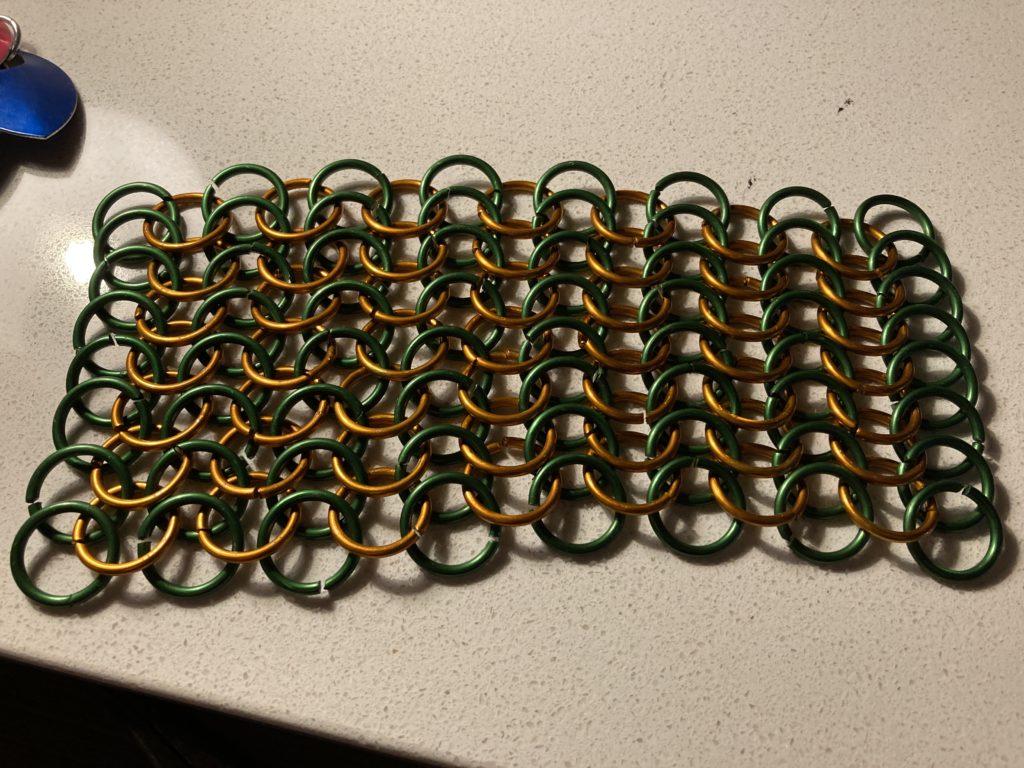
I did some clinics at Ohayocon with Alexander from Armor Academy. Learned chain maille and scale maille. Now I have ideas. This might get weird. Like anyone reading this would be surprised by that.

A few people asked about this one, so here goes. More pics to come.

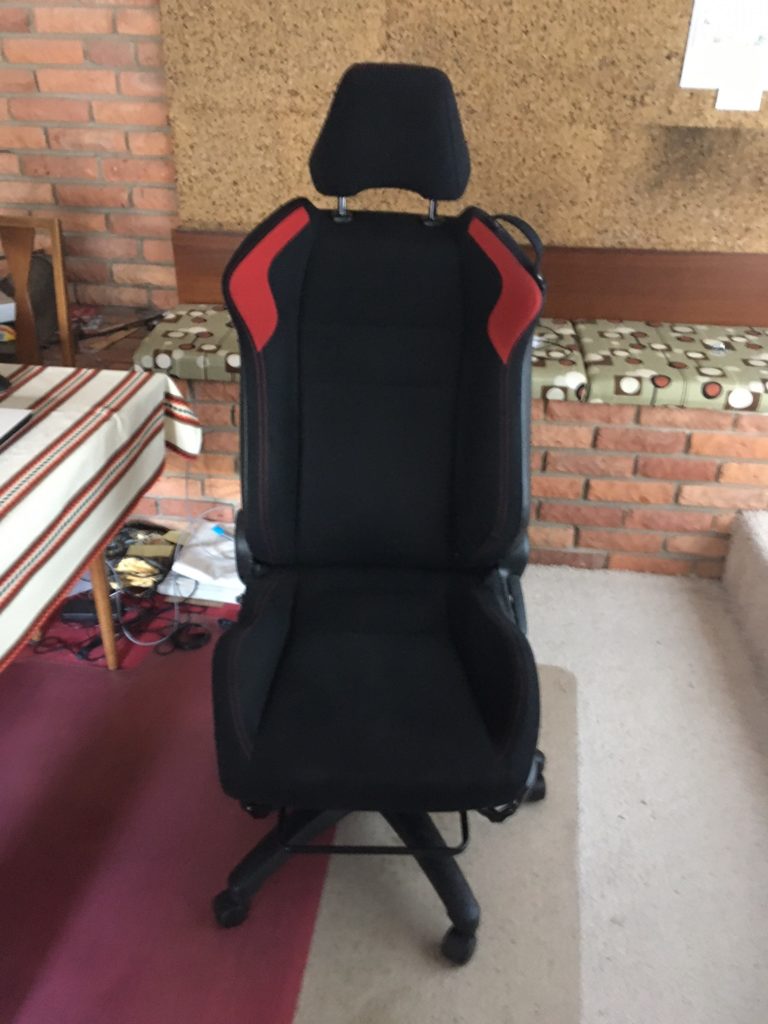
I picked up a pair of FRS seats a while ago and decided that as I actually had no real use for them, I would make a desk chair for my home office space. Combined with my new desk, this was a serious win.

New desk with FRS seat office chair

Materials included one 28″ desk chair base – https://www.amazon.com/Hihone-Replacement-Cylinder-Casters-Adjustable/dp/B08B7SVWCH is the one I used. You might need a shorter one, but I would not get a smaller diameter one. These seats are heavy, due to being automotive grade. I also used a 4′ section of steel L channel in 2″x1.5″. I cut this into two pieces that span the underside of the seat. I used 8 1-inch 1/4″ bolts, two 2-inch 1/4″ bolts, washers everywhere, and about 24 1/4″ nuts.

The biggest challenge with this project is getting the seat pitch correct. It’s a car seat from a sports car, so the seat base is pitched back qutie a bit. This does not work for an office chair. In addition, the seat mount on the seat base is also pitched back. To correct this, you have to suspend the front of the chair. (Pic coming soon)

Just the chair

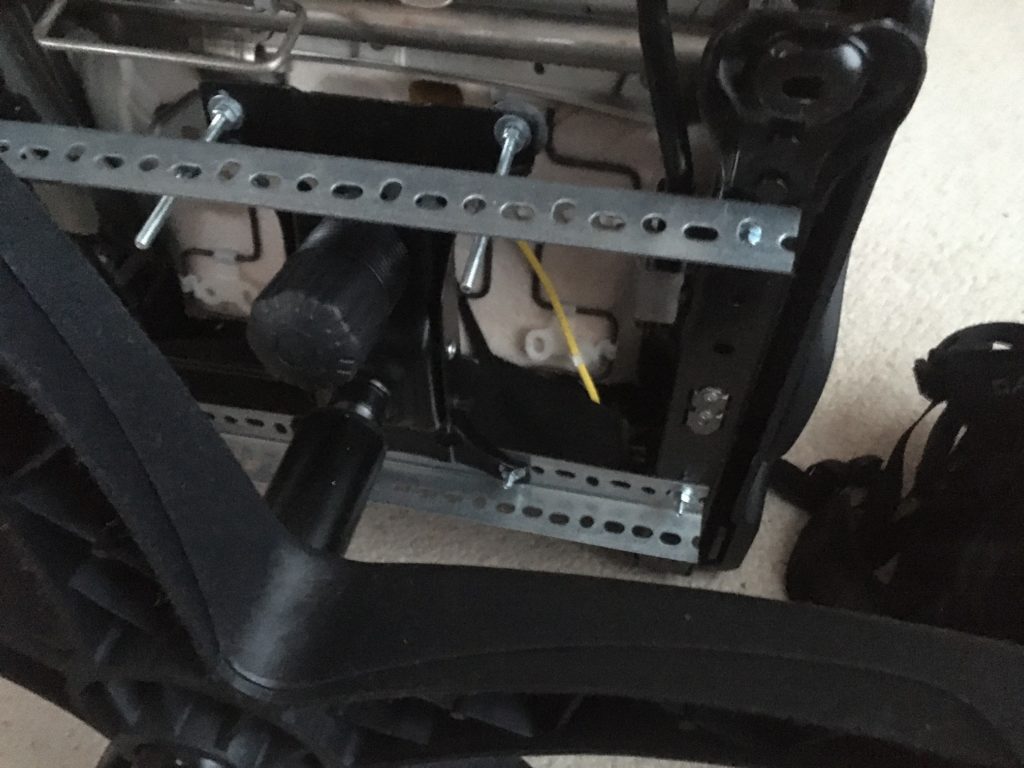
If you use the seat rails (I did), you will have to drill one hole on each side to line up with the front holes in the chair mount. Take one of the pieces of L channel and mount it to the rear holes on the seat rails. Measure forward on the chair base to get the correct offset for the front mounting bar and drill the appropriate holes in the seat rails. Mount the other piece of L channel to those holes. Don’t tighten anything down hard yet.

The hole you drill

You can remove the seat rails and just mount the actual seat if you are on the shorter side, but at 5’6″, I did not have to do this. I still have some down-space on the gas shock, too.

Now for the fun. Tip the seat over. I got a kitchen chair and put it upside-down on that to make it easier to work on. Take the chair mount off the chair base (it lifts off) and insert it under the front L channel, and over the rear L Channel. Bolt the back rail to the holes on the back side of the chair mount. Here is where it gets interesting – put the longer bolts into the front holes of the seat base and add washers and nuts Do not snug these up, they need to move around a bunch. There is enough flexibility in the steel to allow you to wiggle things around. I used 3″ bolts here, but 2″ or 2.5″ are more than enough and easier to work with. Add two more nuts and a washer and wiggle them into the front L channel. NOW, tighten them up at the chair base mount.

Better view of rear setup

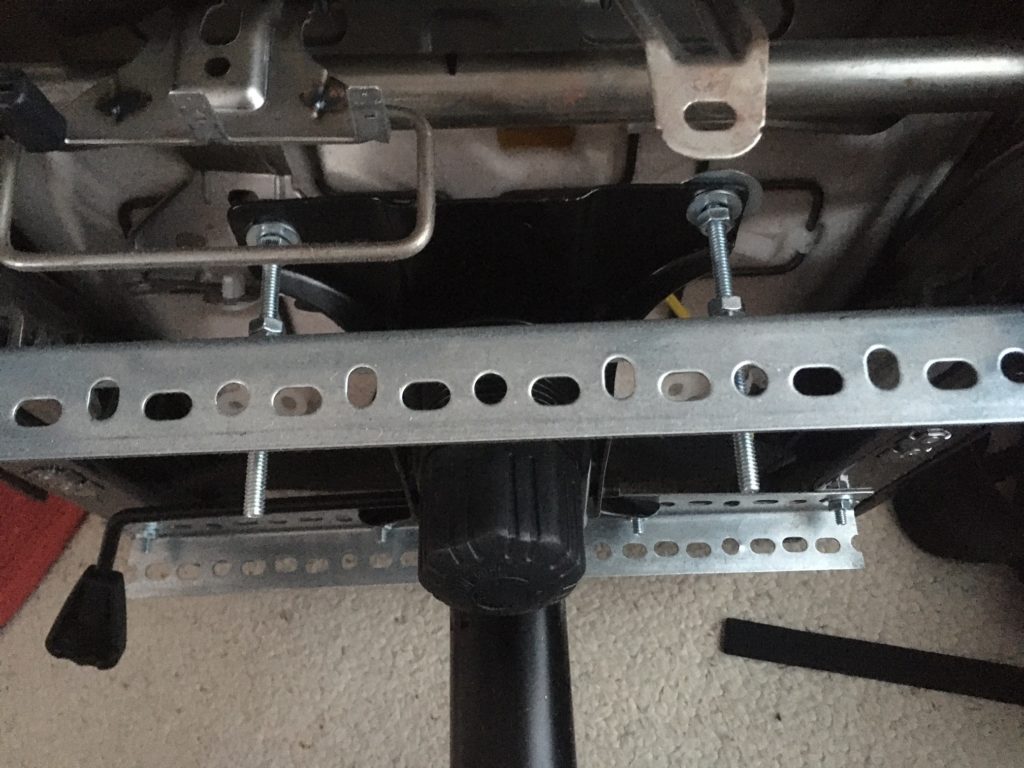
At this point, you are ready to set your seat pitch. Add a washer and nut to the stubs of the long bolts sticking through the front L channel. Flip the whole mess over and get your level out. Adjust the height of the front of the seat so it is comfortable and then tighten everything up. Use the jam nuts (the double nuts on “top” of the front L channel) to hold the position.

Suspension adjustment for seat pitch

There you go. Enjoy your new desk chair. Mine is awesome!

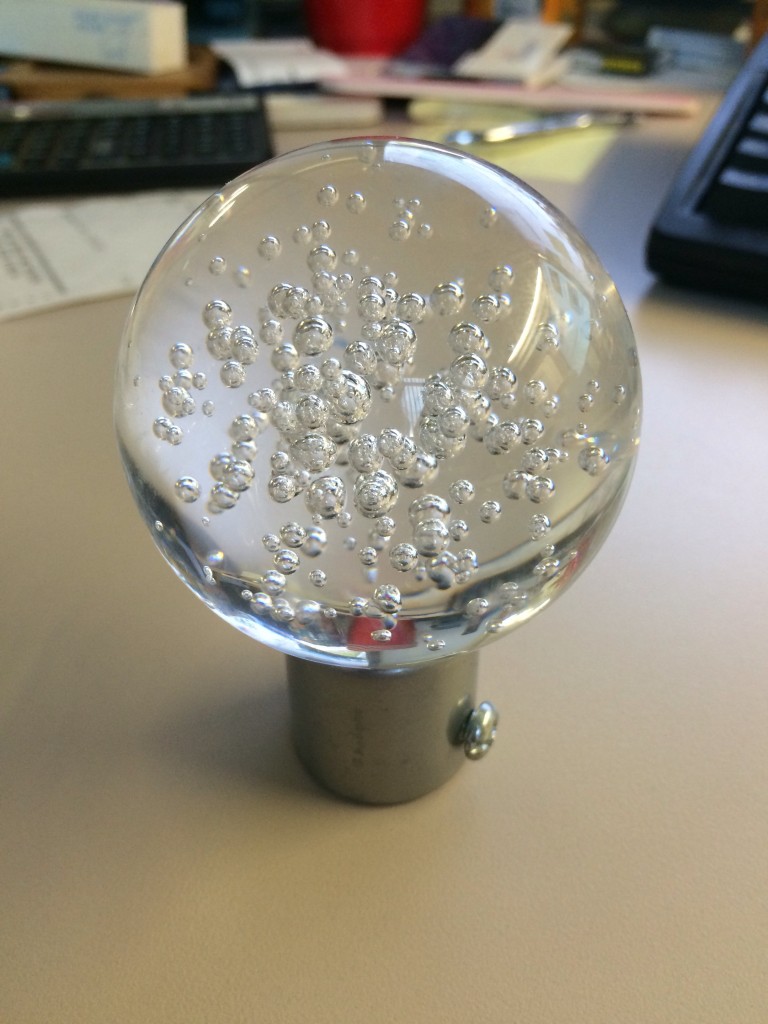
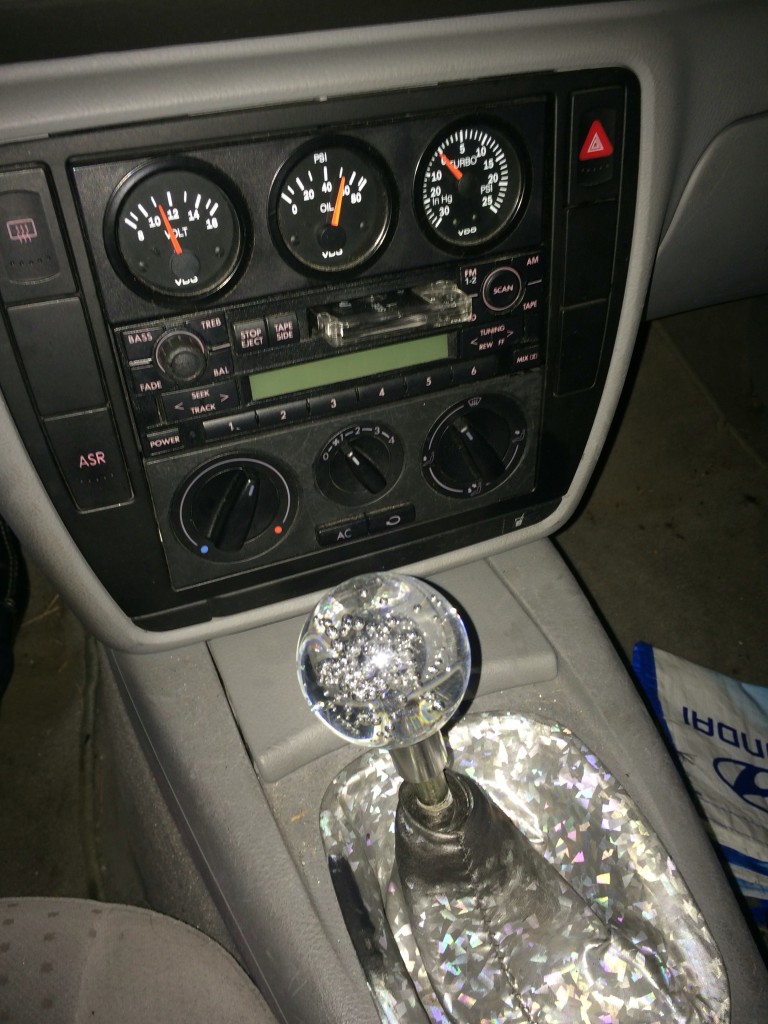
It’s an IKEA curtain rod end. I think it’s called Lystra. It was a joke, one of those April Fool’s things we used to do on ClubB5.com back in the day. This had to be back in like 2001-2. I remember taking pics on the AC Expressway. I had pulled the knob and found that the shifter shaft was hollow. Oh yes. The wheels were turning.

My dad machined the stainless base for me. It took a couple of tries to get it all right. Including the electronics. I blew a few LEDs getting it sorted, but eventually got it wired into the dash dimmer circuit, because that is what I do. It also took a while to find the correct color of LED, these are rather violet, not the traditional teal that was common back then.

Blue Bubble Ball

So if you ever want to blame someone for a Pep Boys mod, well, now you know. It was a joke. We had a laugh. I still put it on once in a while when I light up the roof. May as well enjoy the old beast, right?

OEM+

The pinnacle of early 2000s VW modding – poaching partsbin bits for upgrades. This is the OEM taxi dome light switch, wired into the dash dimmer and driving the fibre optic headliner off rail power. It’s my dream install and I am completely delighted. The switch arrived today thanks to a fellow B5er who reduced his hoard of parts by one switch.