Style

There was a request to address the fibre optic headliner.

So. I redid the headliner in the B5. With custom-printed fabric from Contrando. I did a sticker bomb pattern of my girlie logo. It’s awesome.

I purchased a 14W light engine from amazon Chinapost. It was $45 with 250 3m strands of roughly 1mm optical fibre. I also purchased an extra 100m of fibre.

I did the headliner like normal with lots of pattern matching so that the sunroof cover lines up when it is closed. This was not that hard. There was a lot of spray adhesive and high temp hot glue involved. See above.

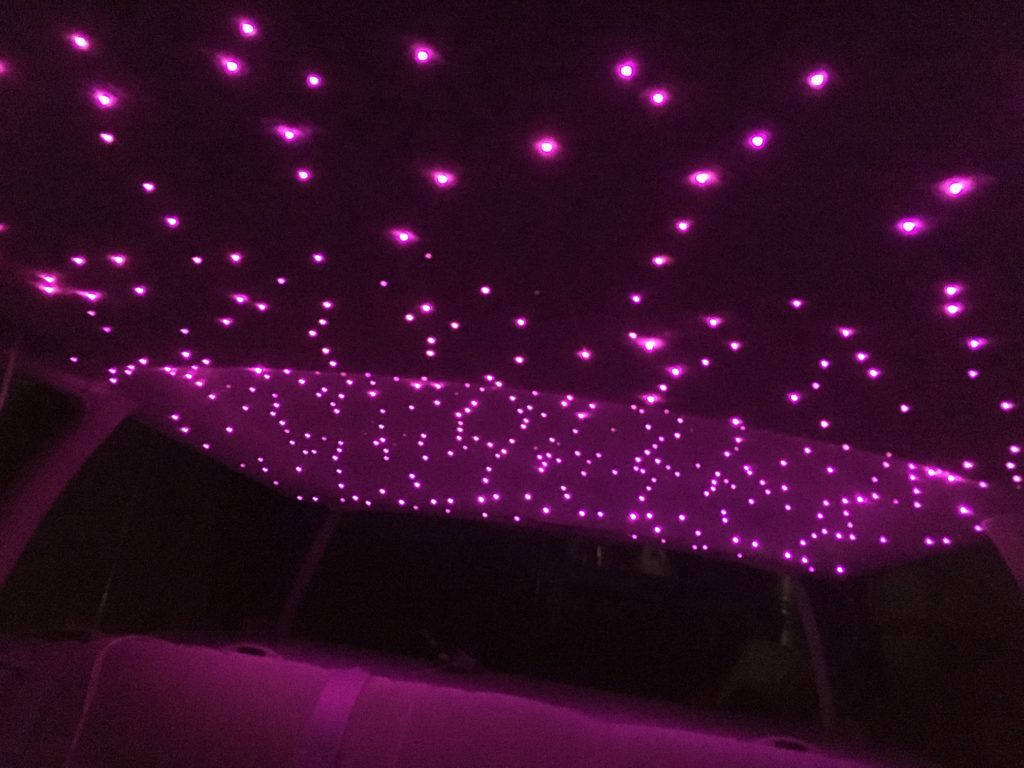
Then… the fibres. There was much hemming and hawing about how to do the fibre insertion. I originally wanted to do a random pattern, but then realized that that would be pretty hard to accomplish with basically acres of headliner. So, I opted to put a fibre in each complete eyeball in the pattern. Basically light up pupils. The first 250 fibres took me about two weeks to get in. The next 250 took me another two weeks. The last hundred took me about a morning because I wanted that **** done.

The process I used was…

Poke a hole through the headliner in the desired location using an upholstery needle. This left a big enough hole that I could find it later, and almost big enough to get the fiber through. The headliner is a lot thicker than I realized, up to 1/2″ in places. Once I had all of the eyes located and poked through, then I started threading the fibre.

I did have to figure out where to stick the light engine as there is a sunroof in the car and that limits space a bit. I put it near the C pillar so it was easy to peek at if needed. All fibres ran to this location.

Threading the fibres required me to insert the needle and then catch the end of the fibre with it. Then push the fibre through allowing it to follow the needle. This was a lot of work and took me a bit to get a method down. Once I got it going, it was better. I needed a lot of ambient light to see the fibre ends. I ran the entire 250 fibre bundle first before moving to the next step. Then I cut the fibres and hot-glued them on the back side of the headliner. The hot glue melts at a temperature close to that of PMMA so I had to hold the fibres in position until the glue solidified a bit. This was about ten seconds.

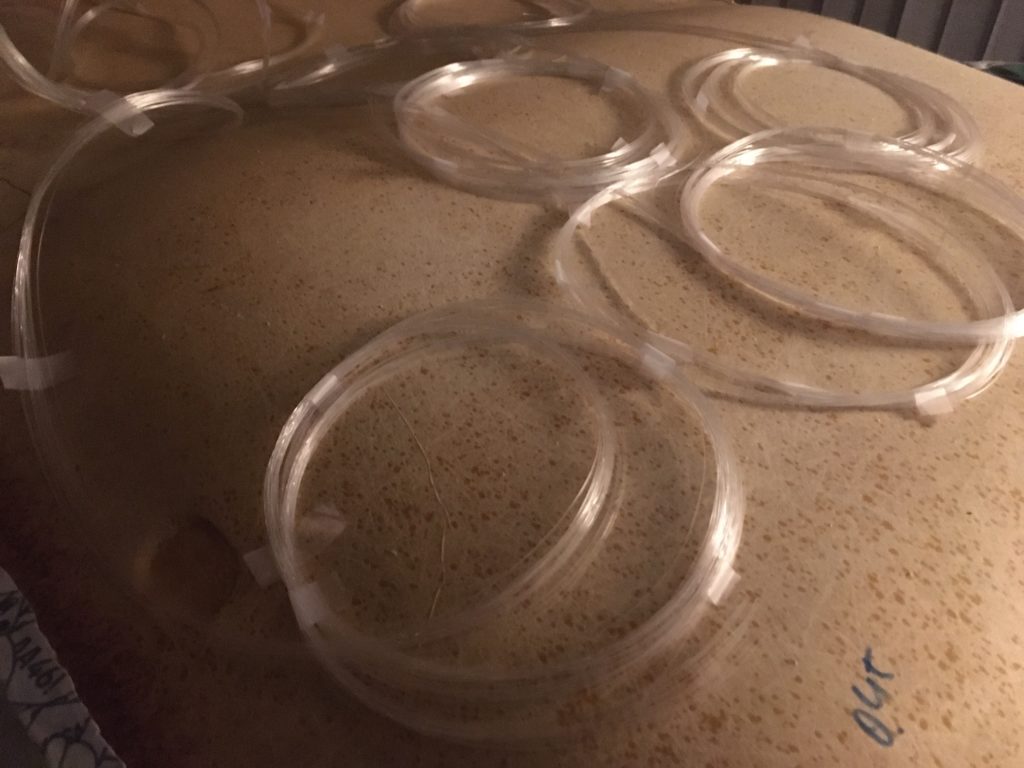
I reserved all of the cut ends as they varied in length from 1 foot to about 8 feet. I reused all of these, finding the flat ends to face the light engine. Then, I started cutting into my coil of PMMA. In the end, I believe it was 618 individual fibres.

Once I had the fibres in, I had to equalize the lengths and get them into the coupler. This was difficult and I have no pics.

The last thing I did was glue down a piece of nylon fabric over the middle of it to protect the strands in the middle from the sunroof assembly. Again, no pic because doggone it, at that point, I wanted it done and in.

It is utterly amazing. I cannot describe how happy I am with it.

I found this oldie when replying to a BRZ thread. Original date was 15FEB2006.

I got the email from Volkswagen last evening: I would finally find out what my fast was about. I clicked in anticipation, who knows, maybe my fast would be special, maybe I would actually get a fast. Whatever, I was off for the e-ride.

My fast looked suspiciously similar to the fast I had already seen in the forums of TCL, but whatever. It was cute, if a little bit pudgy. Certainly more pudgy than the fast I have out in my garage, although it is certainly faster than the fast in my garage. That fast is not very fast, although it is very noisy and seems to think it can talk to me. I had the sneaking suspicion that my fast looked just like everyone else’s fast. Bummer.

I worked my way through the car configurator to see how fast I was going to go. I have to admit, the configurator was nicely done. Keeping tabs on the cost, advising when an option was part of a package, showing the parts on the vehicle, and good informational blurbs about each option. Very well done. I was particularly interested in the “joy ride” selection. I knew I was off for an e-ride, but an e-joyride? What the hell is that? I clicked. A clipped, European female voice advised me that the joyride would be handled by an expert driver on a closed course. It was right there that I went wrong. My wrongness would become readily apparent in mere moments.

At the words “expert driver on closed course” I made a critical error. My mind drifted. I let myself imagine who I would want my “expert driver” to be. I drifted further, would he be better looking than Schumi? More confident than Rubens? Would he be the racing equivalent of Fabio? I admit it – the sexy female voice told me I would get an expert driver. No crime in hoping for a good looking one. If I’m going to take a fantasy e-joyride with a guy, I want it to be nice, and good looks under the helmet will be a definite plus.

Then Helga popped up.

Uh, ok.

A porn star in a nurse’s uniform with a Cinnabon on her head is now on my screen. What does this have to do with joyriding? I have heels like that, I sure as hell don’t wear them when I’m racing. I don’t generally associate wearing them with driving at all. Little problem with ankle extension on the clutch foot, you see.

I want Hans, not Helga. And now she’s a cloying kitten, teasing the ******* in the rice rocket in the next lane over. This is embarrassing. Car chicks do not behave like that. We wear our clothes when we take your pink slip, thank you.

<detour>
It would not be possible to abuse Mitsubishi’s j-cool concept more heavily than the creative people did in this bit. Stereotype takes on new meaning after seeing that car. Yellow may be fast, and stickers may mean horsepower, but daaaaaayyy-um! That thing had it all! And the wigger that was driving it? Please! The Icy-Hot Stunnas could not have done a better job of creating that train wreck. Did I see diamonds on those teeth? Holy crap. If I wasn’t laughing out loud at Helga, I’m laughing out loud at this fool.
</detour>

So I watch while Helga drops the flags. The cars launch. Wait a minute, now she’s back in the car? Um, story board foul-up. It’s a bit hard to get around a launching vehicle and into the passenger seat if you are the starter. Wait, it’s supposed to be a fantasy e-joyride. I suppose anything can happen. It’s also a straight quarter, not exactly what I would do with a GTI – it’s supposed to be a You-Ro-Pee-N car with that fancy handling, right? What kind of handling is required for a straight quarter mile? More racing stereotypes leave me feeling cold.

With the rice rocket slain, Helga drops me off at the starting line and speeds off with those leg-breaking heels. I guess I’m supposed to be in some state of arousal at this point, but I am not. I am laughing. If humor was the point, I’m getting it. I am emailing this silly bit of teenage-boy marketing to my car-girlfriends so they can laugh at it, too. And they will. They will laugh and email it to their car-girlfriends, and so on. We will tell Helga jokes. Poor Helga. And we will snicker about this gorgeous GTI for a long time. We will probably not buy so many of them, because Volkswagen has told us where we stand in relation to it. We don’t.

You see, we’re not the target market. We’re girls.

I bought a Cricut Maker. I now have magnet numbers. I recreated the font from the car numbers in MF Ghost.

Magnet numbers!

Magnet numbers how-to.

You will need a Cricut Maker (the $400 one), magnet vinyl (available from Michael’s and/or Amazon), software that can output .jpgs or .pngs, and the Cricut app. You can add colored vinyl to laminate with for an extra challenge.

1. Prepare the magnet vinyl by magnetting it to your washing machine, fridge, steel door, or any other flat surface. It comes in rolls and needs to be flat to go through the Cricut nicely. Leave it there for two days. If you are laminating vinyl on, then unroll the vinyl and hang that up to flatten, too.

2. Design your numbers. Use your graphics software or whatever. Output a graphics file that the Cricut app can read (.jpg seems to work better than .png).

3. If you are so inclined and really want hot pink numbers, laminate the colored vinyl to the magnet vinyl. This is not easy and it took me to the third go before I could make it look decent without a million bubbles. Don’t hate yourself. 

4. Load up the Cricut app and set your design. I found that using the whole 12×24 sheet of magnet vinyl on the 12×24 grip pad worked better, but then you have to drop the $$ on the big pad. 

5. Stick the magnet vinyl to the grip pad. Make sure it is exactly in the lines because the positioning rollers will push it around if you are running the full 12″ width sheet. This will cause cuts within 0.5″ of the edges to not be just so. 

6. Set the material to 0.5mm magnet sheet. 0.6mm also works, but tends to cut through and into the grip pad. DAMHIK. 

7. Cut your numbers. At 0.5mm it will run the pattern twice. This is normal. I think it does three times for 0.6mm.

8. Put your numbers on your car and look awesome at the track/autocross. 

I have been running this material for several track days now, and have left them on by accident (lol) for driving to work (lots of traffic and highway). It stays on well and doesn’t move around. Do make sure your car is very clean before sticking the numbers on as if there is dust, it will get into the paint.

There are probably a hundred different ways to learn Japanese. Then, there is my way. But you saw that coming.

The most important part of a learning experience is determining your goal. Right up front, my goal with this has been to be able to read work PowerPoints. Not very lofty on the surface, but actually pretty complicated. I read and speak German quite well, reading novels, newspapers, and yes, work PowerPoints. With a rehearsal or two, I can actually present in German. Getting to that level in Japanese may not happen, but I am going to try.

With the clear goal of reading in mind, the challenge of learning kanji, the graphemes that make up Chinese and Japanese text, is at the forefront. My exercise is not about learning Japanese so much as learning to read it and that means kanji is more critical than anything else. Kanji is a unique writing system that can be learned without learning any Japanese whatsoever, actually. In fact, pretty much all of my Shanghai-dialect Chinese consists of reading kanji and not having any idea how to say them. I am functionally voiceless in China. I do not want that to happen with Japanese. Research into kanji tools led me to a strange blog named Tofugu, and their kanji learning tool WaniKani.

WaniKani is a spaced repetition tool that uses the radical system for teaching kanji. It is focused on the top 2000 characters and the vocabulary that use them. It does not teach Japanese, rather, it teaches a way to read Japanese and learn to interact with the kanji writing system. So far, I’m on level 19 of 60, and ready to go from Painful to Death. The language of the tool is very cute and humorous, but so far it is working for me.

Kanji is also giving me a new way to express myself, so don’t be surprised if you start seeing some here. 私は漢字は好きです。My imperfect grammar will likely be painful, but whatever. It’s a whole new way to express my self, and that is kind of pretty baller all on its own.

In October, I started a new task – I began learning Japanese. I’d discovered a sister plant to one of my three at work, a plant in Kakogawa, Japan, and decided that if the only thing holding back a lot of communication was language, that was not an excuse. It’s morphed into something I never expected – a new cultural experience that is augmented by two slightly Japan-nutty kids.

I’ll be writing more about the experience over the next few months.

A kid at the college autocross had this beat-to-crap old gen2 Supra that had these awful Chinese decals all over it. He said he was thinking of removing them, but kind of liked how silly they were. I said no, leave them, because they add character.

Dur.

I posted this in the Women’s Forum at ADVrider, and I think it’s good enough for general consumption.

I can write a book but will try to keep it not too long. I am trained in patternmaking, that weird job where you create the flat fabric pieces that get turned into 3D shapes. It illuminates so many of our fit issues. Understanding your body shape can go a long way to finding gear that fits and knowing why gear doesn’t fit and might not even be tailorable to fit.

The basics

Women come in four basic shapes, combinations of two tops and two bottoms. Tops are either wide shoulders or narrow shoulders, and bottoms are wide or narrow hips, both measured with respect to waist measurement. When you combine them, you get the following:

Narrow shoulders and narrow hips: Column (sometimes called apple). This is the traditional boy shape. If you are a column, awesome, you can wear mens’ gear most of the time, unless you have big boobs. About 50%

Wide shoulders and narrow hips: Triangle. This is the athletic shape. You can wear guy stuff, too, But the size mismatches will get funny. Boobs usually fit, but jacket waists will be a mile wide. 5%

Wide shoulders and wide hips: Hourglass. Oh, you are screwed. You might look like Marilyn Monroe, but no one else does, so no gear for you! A very surprising 10%

Narrow shoulders and wide hips: Pear. This is the shape that is most confusing to designers, because it is the opposite of their runway models. You might have thighs, too. Yikes! Nothing fits well. 35%

How the shapes break down into patterns

Narrow shapes are based on drops (difference between hip or upper chest measurement and waist measurements) that are smaller – 6″ or less for pants, 3″ or less for jackets. These fits are often called ‘straight’ cut. Wide shapes are based on larger drops – 7″ or greater for pants, 4″ or greater for jackets. These fits are often called ‘curvy’ cut. Curvy varies from 7″ to 10″ and greater. The Silver Jeans website has a wonderful description of how these fits work for pants.

The pattern must be cut to account for the drop and enable the wearer to move comfortably. This practice is called ‘adding ease’. In straight cuts, the ease is added to the hips. For curvy cuts, it is added to the thighs. This is why curvy girls struggle with pants – low drop straight cut pants will give them swimming pool butt with large gaps at the waist, because their waists are so much smaller relative to their hips and thighs. Ladies with narrow hips will find everything is baggy below their waist, a poor choice for keeping armor in place. Ease placement is why it is so difficult to make pants fit when cutting them down at the waist. In reality, you also have to add at the thighs and reshape the entire butt. Not practical with technical gear.

The same applies to jackets, with one additional issue: backwaist. Backwaist is the measurement from the neckline to the waistine. Women are generally about 15-20% shorter in backwaist than men. It is actually a primary physical marker we recognize about women. A jacket designed from scratch for a woman will reflect this. It will also include boob room. Boob room is independent of shoulder room, though! Shoulder room is cut into the back of the jacket, boob room into the front. Boob room requires aggressive shaping of the waist line and is the bane of most patternmakers’ existence, honestly. One wrong grain line layout and nothing works. This is why many women’s jackets come with adjustable waistbands: it is possible to add boob room and still cinch the waist down to an appropriate size. Jackets are actually easier to tailor because the main issue is cutting down the waist. Note that actual shortening of a jacket generally requires it to be shortened at the waistline, not the hem.

Beginning your shapely adventure

Have a friend measure you. It works better. Stand tall, relax, and breath gently. Measure at your belly button, around your boobs, above your boobs (upper chest), and at your hips (7-9″ down from your waist). Know your drops. Know if you need boob room – typically anything over a B cup will need boob room. Bs can fit lots of places and As are lucky ducks. Look carefully at the sizing cards for gear lines. They will reveal a lot. However, they are guides and some manufacturers do actually have curvy fits.

Feel free to ask me anything about fit. Thanks are due to my mom, who still believes that a solid understanding of flat pattern is a required life skill.

My experiences….

Alpinestars Stella is pure straight fit top and bottom Size Chart

Dainese has both curvy and straight, you have to try stuff on Size Chart

Rev’It has both, try it on Size Chart

BMW has mostly straighter fits, but the new Tourshell is definitely curvier and GS Dry is too Size Chart

(German) polo – each brand line has a specific fit model, all are different

(German) Louis – same as polo, lots of variety

(German) Hein Gericke – all curvy-friendly

Olympia is big boob friendly, but no curvy fits Sizing link

Joe Rocket has some nearly curvy stuff, but the fits varied across sizes too much for my comfort Size Chart

Speed and Strength was a big surprise as they have curvy stuff Size Chart

Klim Size Chart

IXS generally straighter cuts, will note curvy styles on tag Size Chart

First Gear Size Chart

Aerostich they have not really figured out thighs yet, but seem to be trying Size Chart

Worse for Wear great jeans with well-defined fit models Size Chart

Icon Size Chart

Fieldsheer Size Chart

I will add as I try on other gear here and there.