Motorbikes

The 11mm Brembo master cylinder fitted to the rear braking system on many Aprilia, BMW, and KTM motorcycles is a weak point, to put it mildly. Regardless, it is fixable. See below for how and why.

0. Tools required
Inside circlip pliers
10mm socket
5mm hex drive
2mm long drift (10cm) or 2mm Allen wrench
Tack hammer
Long-nose pliers
Flat-head screwdriver
Dental picks
Dremel with small round cutting bit
One full rebuild kit from Brembo, part number 110.4362.41

1. Remove the master cylinder from the bike. To do this, remove the bolt holding the brake fluid reservoir and washer with a 10mm socket. Return the bolt and washer to the hole to insure they are not lost. Drain the reservoir and replace the lid and gasket. Release the brake line fitting from the top of the master cylinder and back it out entirely. Remove the two bolts securing the MC to the bike using a 5mm hex drive. Lift the MC away from the bike, clearing the brake line at the top. The push rod will slide out of the rubber boot at the bottom with a slight tug. Return the two hex screws to the bike for safekeeping.

2. Retire to somewhere warm (or cool…), you might be there for a while. Bring the MC with you. Spread some paper towels or other protection out, and drain the master cylinder fully. Set aside the rebuild kit for later.
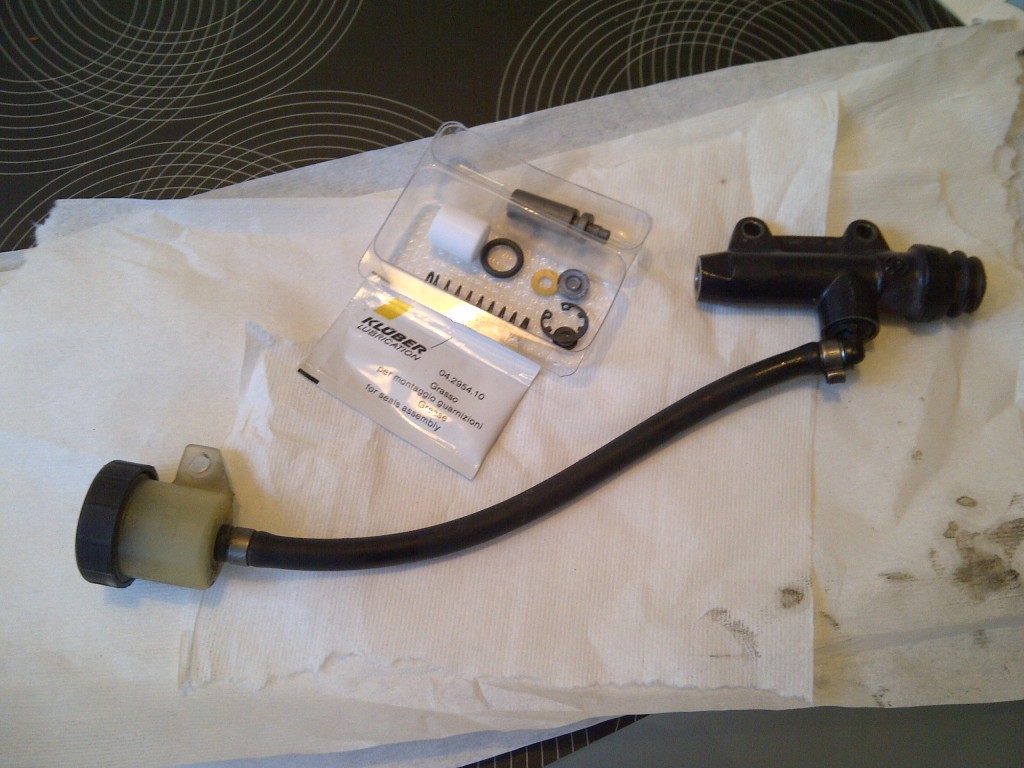
IMG-20130113-00182

3. Carefully examine the MC. Remove the rubber boot by tugging at it gently. To help it, insert a flat screwdriver into the groove at the base of the MC and gently prise the boot away. Looking down the bore of the MC, you will see the piston at the center, a white spacer surrounding the piston, and a circlip holding it all together. The circlip may be rusty, if it is, you have some work on your hands. See below for a good (bad) example of a rusty circlip.
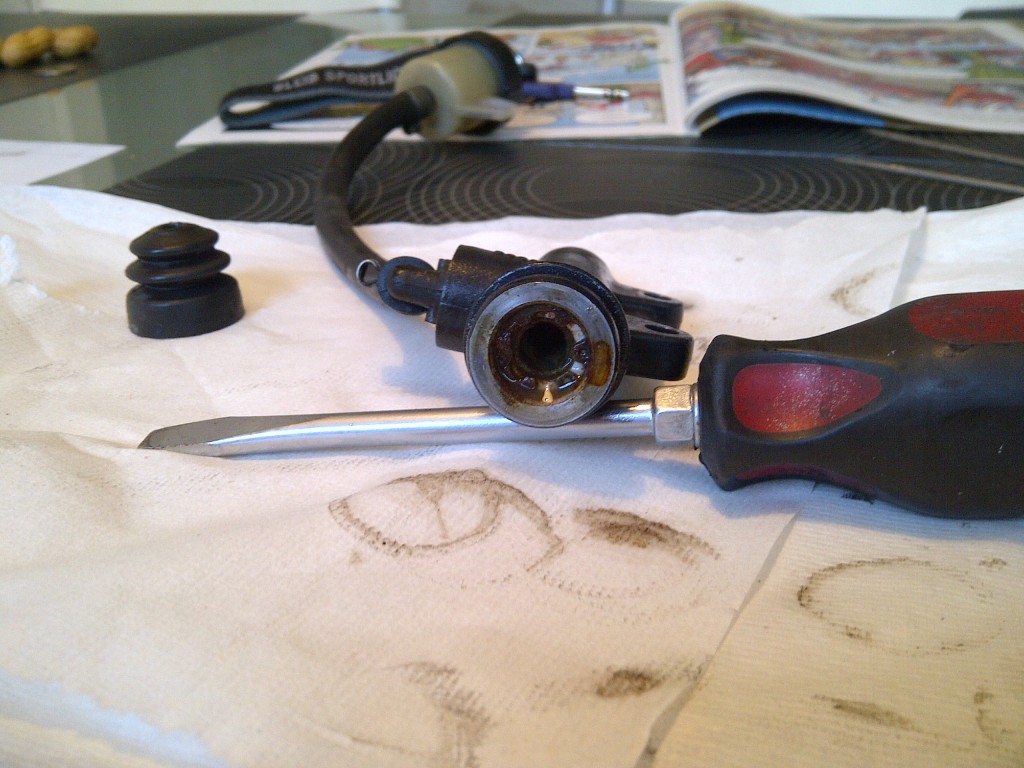
IMG-20130113-00184

4. Remove the circlip using inside ring removing pliers. If the piston is stuck, use a long 2mm drift or a 2mm Allen wrench to drive it out from the top side. Tap the drift or the Allen key gently with a tack hammer, checking the other end for progress occasionally. When approximately 4mm of piston are exposed, gently grab the piston with long nose pliers and slide it out. This will all require some effort. The spring and spring seat will also come out at this time, or can be shaken out gently. Examine the piston for corrosion and clean it.
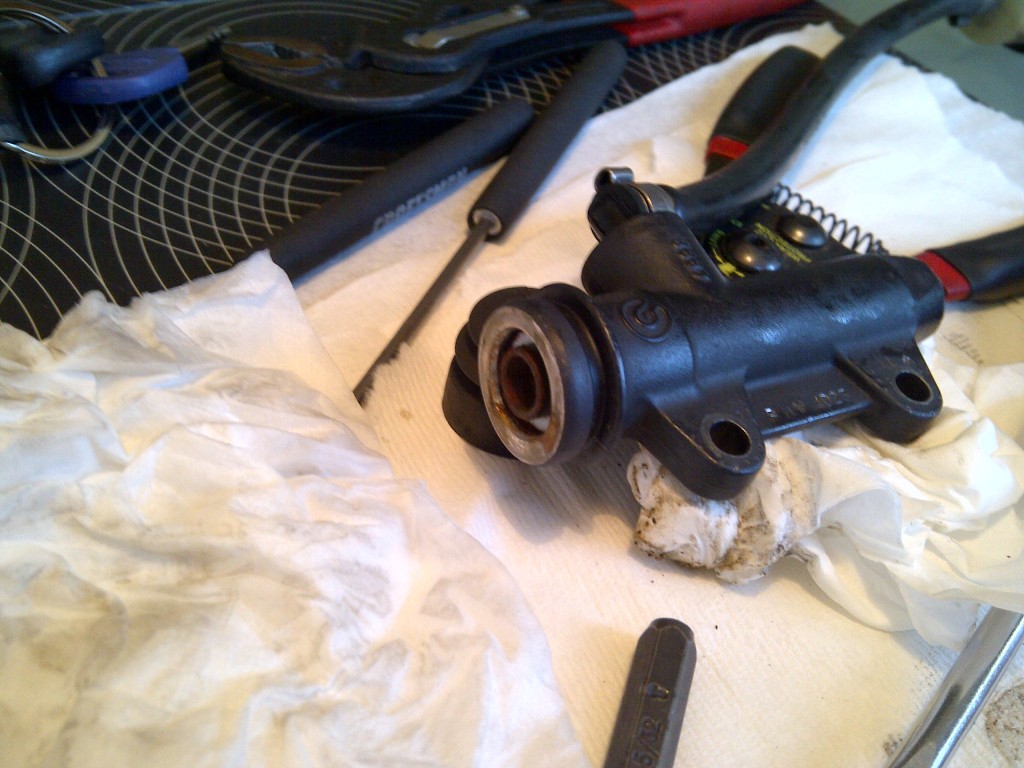
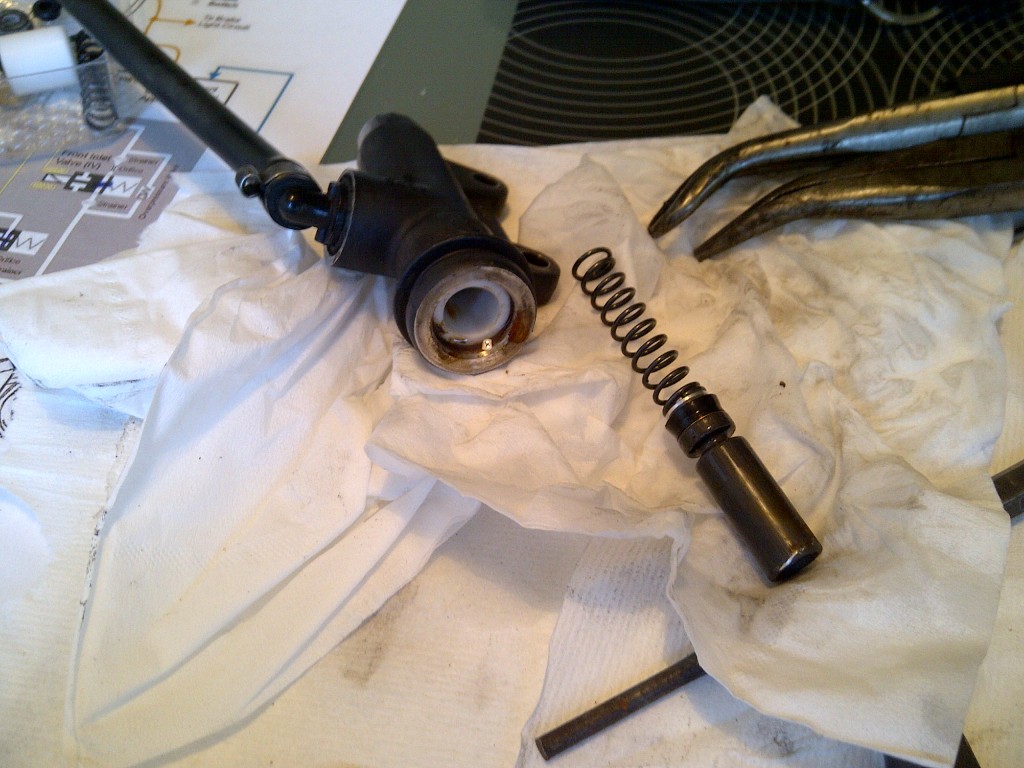
IMG-20130113-00185

IMG-20130113-00187

5. Now for the fun. The white sleeve may not slide out willingly. If it did, you would not likely be attempting this repair. A rather easy way to remove the sleeve is to grind or cut a groove in it. I used a 2mm ball-shaped cutting bit on my Dremel and ground out two channels, one the full length of the sleeve. Using the circlip pliers, twist the sleeve in the MC body and slowly work it out. Another way to remove the sleeve is to turn the bits of a 90° circlip tool to the outside and use it as a puller. In either case, take care not to damage the surface of the bore. It is not a sealing surface, but smooth is very important to the cylinder staying functional for any length of time. After removing the white sleeve, remove the o-ring that is still in the bore.
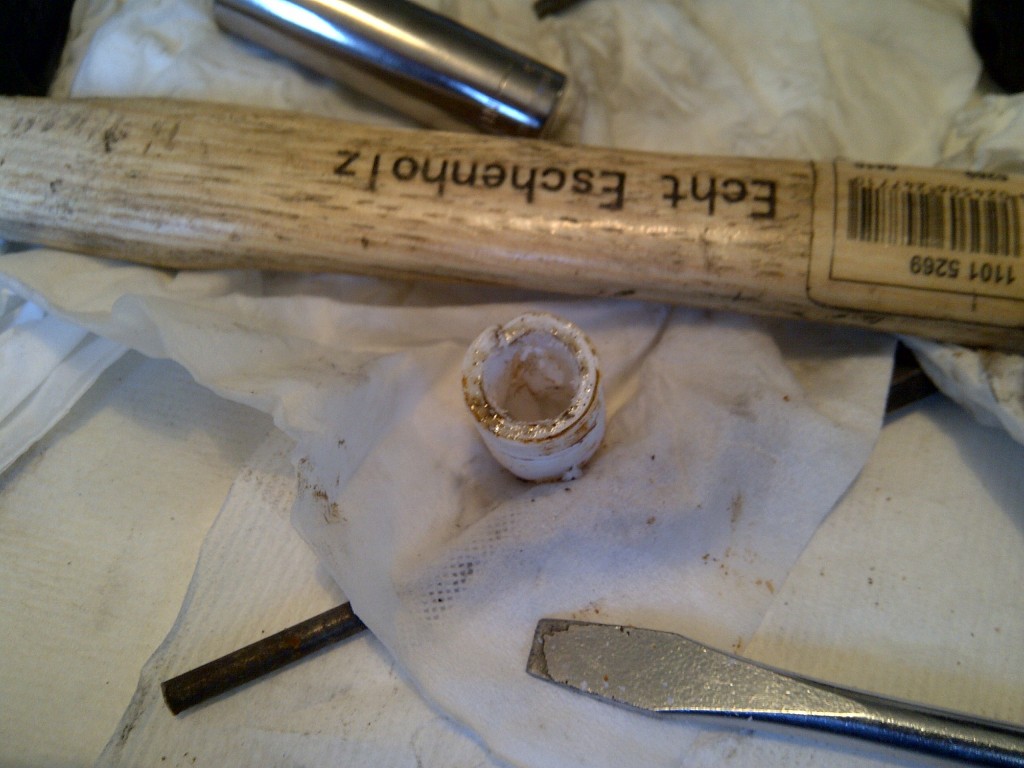
IMG-20130113-00190

6. Once the white sleeve is removed, you will have to clean the inside of the outer bore where the sleeve was sitting. If the circlip was rusty, you will likely also find rust inside of the bore. Using Scotchbrite, steel wool, or very fine sandpaper, remove the red rust from the bore. Clean the bore to remove the residue from this round of cleaning.
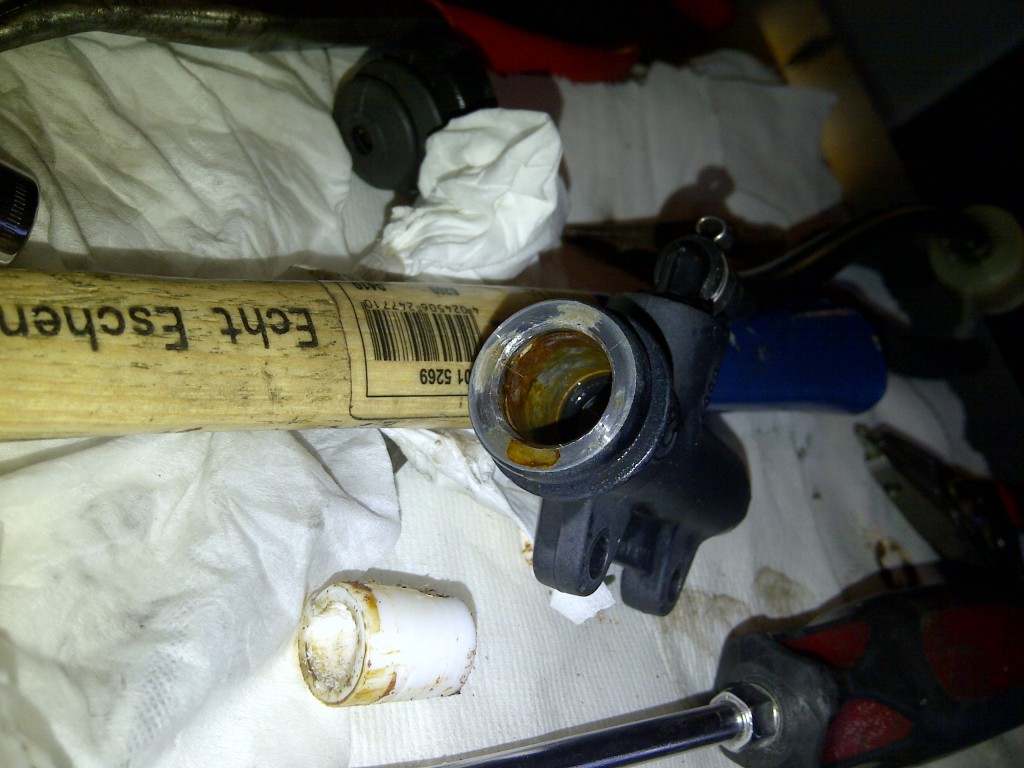
IMG-20130113-00188

7. This step is critical to determining whether the MC is going to be repairable for any length of time. After the red rust is removed, use a pick to investigate the condition of the outer bore. If you have tiny fingers, they will work, too. Now, you are looking for corrosion of the aluminium cylinder body. This is the corrosion that is causing the piston to stick, not the red rust. Using a pick, gently flake away any aluminium oxide that has built up in the bore. Under the oxide will be pits. There is no getting around this. Fortunately, these pits do not interfere with the operation of the cylinder if they are properly treated prior to reassembly. This process is slow and time-consuming, but will pay off in the end. When you have removed the fluffy stuff, carefully clean the entire MC and the reservoir and feed line. Blow them out well with clean water and air, and dry thoroughly.

8. When you have removed the aluminium oxide from the bore, it is time to open up the rebuild kit and start putting things back together. Remove the white sleeve from the kit and test fit it to the bore. It should float smoothly in the bore with only very slight resistance to turning or sliding. This indicates that the bore is free of oxide. Remove the white sleeve, and coat the inside of the bore with Loctite Silver or Heavy Duty (black) antiseize. Do not use copper-based antiseize! This coating should be very very light. Coat the new o-ring with brake assembly grease (HMW polyoxyethylene, supplied in the kit) and insert it into the bore. Insert the white sleeve and twist it gently in the bore. Assemble the spring to its spring seat, and slide the spring into the bore. Coat the piston and seal with brake assembly grease and insert them into the bore. The piston will stick out a bit.
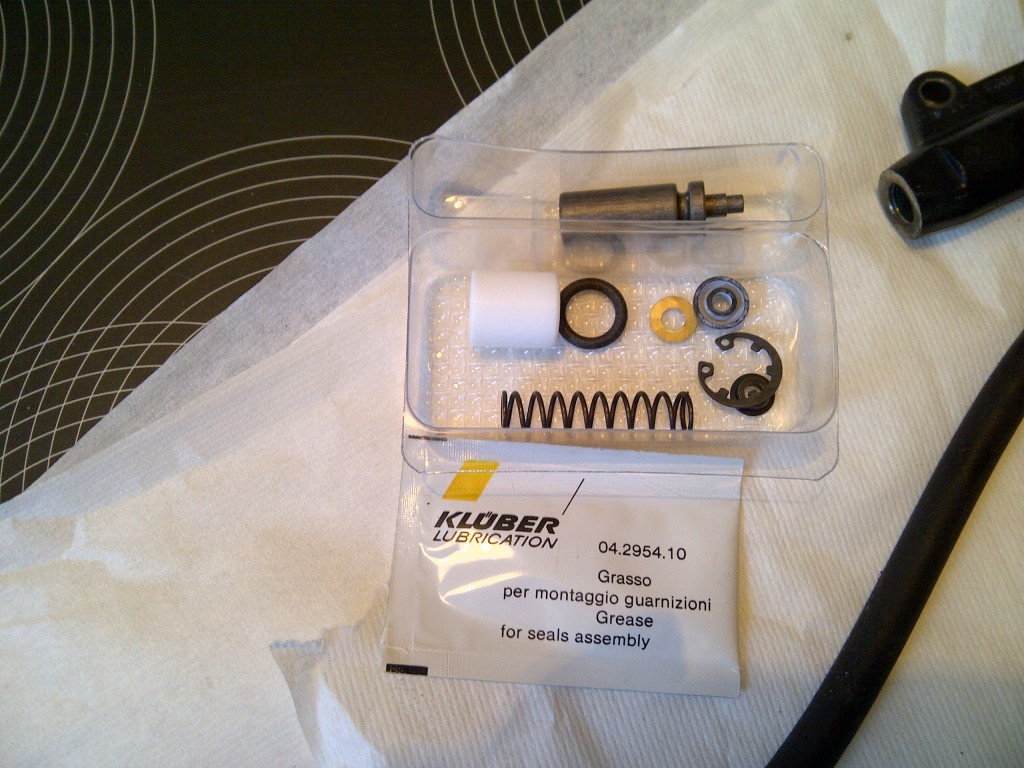
IMG-20130113-00183

9. To finish the assembly, fit the new circlip to the inside circlip pliers.  Secure the master cylinder body and hold the circlip over the piston. Using a suitable drift, inserted through the center of the circlip, depress the piston into the MC, and secure the circlip. Treat the circlip with a drop of wicking grade low-strength threadlocker and, using a pick, draw the threadlocker around the circlip to coat it evenly.
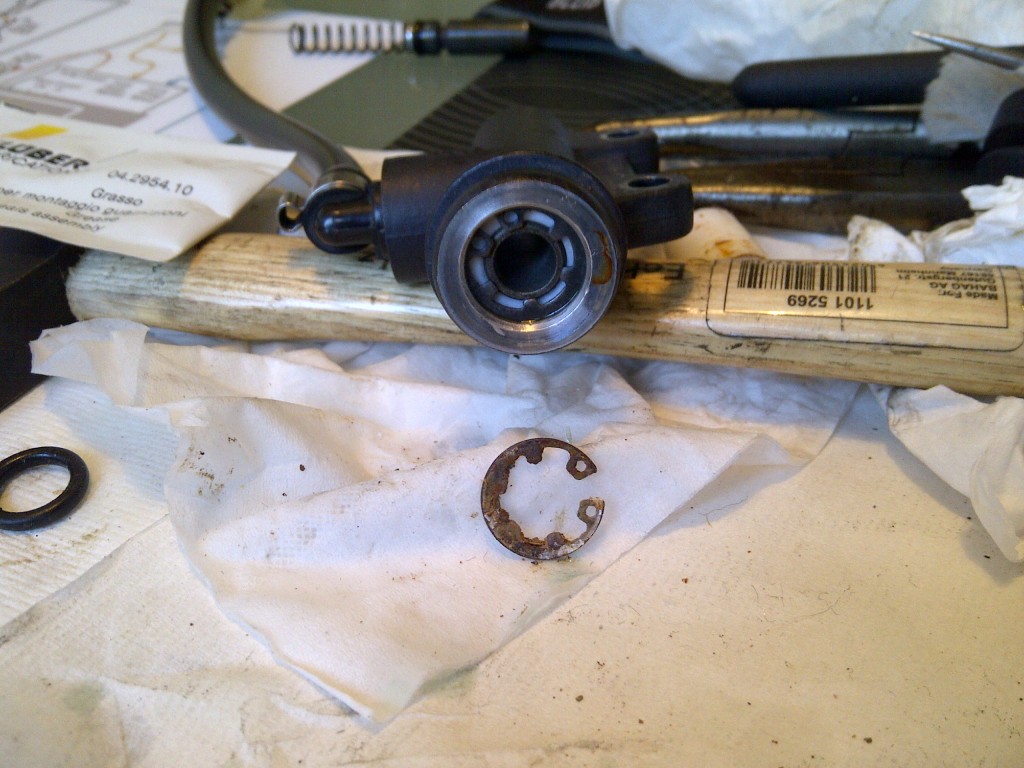
IMG-20130113-00191

10. Bench bleed the MC and install it to the motorbike, in reverse order of removal. Fully bleed the braking system, including at least one ABS activation in the middle of the process.

Conclusion: The boot on the MC is poorly designed and encourages water to enter the space within the boot. Basically, the boot should be inserted into the MC, not sitting on the outside. This moisture leads to corrosion of the circlip. However, corrosion of the circlip is not the reason the whole thing fails, it is just part of a chain reaction of fail. Once the iron starts to go, it triggers a galvanic reaction in the aluminium and the aluminium begins to corrode. The problem is that aluminium oxide is fluffy. Very fluffy. And very incompressibly crystalline. This increase in volume puts pressure on the white sleeve and eventually causes the piston to bind.

My fix: Forget grease. It won’t hold up. Use a heavy duty anti-seize product like Loctite Silver or Heavy Duty (black) to fill the void between the sleeve and bore, and then coat the circlip with low-strength (green) wicking threadlocker, which is commonly used as an anti-corrosive coating on automotive fasteners. If you are in Aviation and have access to Alodine 1424 or the like, a coating of this on the inside of the sleeve bore (along with overnight drying) will also go a long way to preventing repeat performances.

It doesn’t sound too hard, does it, to buy a pair of coveralls that fit? Well, I am female….

Years ago, I purchased a pair of navy blue size 38 regular Dickies coveralls for use around the house and garage. They got about 10 minutes of use before they were ditched for old jeans and a ratty tshirt. Why? Remember what I said about coveralls that fit?

Admittedly, there aren’t quite as many women wearing coveralls as there are guys out there, so it’s no surprise that a decently-fitting pair is hard to come by. Add in that a fair number of the women out there who do wear coveralls aren’t built like Lauren Bacall, and you have a market that isn’t all that attractive to coveralls makers. Because it consists of about four total women.

The difference between coveralls for men and coveralls for women is easy to spot. Women’s coveralls have room for boobs and butts. They also have shorter back-waists – the distance from the collar to the waistline. Mine went into the bin-of-things-we-don’t-know-what-to-do-with because minus the boob and butt room and being too long on the top, I was spending more time adjusting them than a Major League Baseball player spends adjusting his you-know-whats.

Last summer, I was going through that bin and pulled out the coveralls. Hmm, project? Sure! I’d already re-sized and significantly altered a two-layer Nomex suit for racing cars, how hard could a pair of coveralls be? The good designers at Dickies were a lot more serious about these things staying together than peeps over at Speed Sport Racing! The coveralls took me over eight hours simply to dismantle to the point that alteration could begin. Adding to the mess was the most complex elastic waist I’ve ever seen, one that requires a special machine to properly install. I got the bulk of the fitting done over the next few weeks, but the elastic waist and its complexity beat me, and I put the project on hold for a while.

Until today.

Alterations are typically bread and butter work for a seamstress. Relatively simply even when complex, and rarely requiring more than a few pins here or there to set up seams. Occasionally, you get something over the top, and you have to resort to machine basting. At the very tip-top of annoying and difficult seams come the ones you have to hand baste – sew by hand before you sew them properly with a machine. I had set aside the annoying elastic waist when exuberant pinning did not solve the problem. Sometime in the winter, I took a stab at it with machine basting. Today, I sucked in a lot of air and got out the pin cushion and thread: I would hand baste this thing and finish it off. Four hours later, three spent out in my garden in the sunshine, and I was rewarded for my effort with a pair of very stock-looking, properly fitting coveralls.

They look completely off-the-shelf. I like that. I just wish they had been off-the-shelf to begin with!

That is all, really. Turned over 3500kms on the not a big Ford truck this week. It’s surprisingly liberating to ride. I had no idea that the biggest benefit would be being far more calm in traffic. You would think I would be nervous with all of the cages around me, but instead, I feel safer. I can get away from them. I can avoid the worst traffic. I can filter. I’m still not ready to split, but I’m sure that will come, probably with a Ninjette or something else a little smaller. This truly has been a game-changer for me, and the game is now on.

It’s one of my favorite literary lines ever, from Michael Crichton’s The Andromeda Strain. The scientist in question is pondering whether successful treatment of the symptoms displayed by his patient means that the disease causing them is actually cured.

So it goes with electronic diagnoses involving logic boards. Stray voltage at one pin results in a strange signal at another one. The voltage can have three sources, but which one is it?

For example, a artificially high (500rpm) tach reading on an F650GS that remains after shut off for several seconds. Coupled with poor running/starting. Symptoms occur only when bike is started wet after cold rain. Brought up to running temp and restarted, the problem is gone. Signal path is a single star circuit of the ECU, the #1 coil, and the tach signal feed. Diagnosis starts with check air and fuel to rule them out for the poor running aspect. Both are fine. Second step – pull plugs. As expected the #1 plug is funny looking, not bad, but a bit pink on the insulator. The primary resistance on the coil is a hair high when the coil body is wet.

Is this a symptom, or is it the disease? I’ll find out when I pull the tach apart. I hope.

All my life, I’ve been pretty good about patents and trademarks. So I’m a bit confused as to why BMW isn’t. The “Motronic” in my bike is actually a Hella product called BMS, as I just learned from the FAQs over at f650.com. This explains a great deal about why it bears so little resemblance to a modern Bosch engine management system, even as it bears resemblances to pieces of so many others.

Did I say anything about wanting to learn a new EFI control codec? No, I did not.

edit – when I wrote this post, I was under the impression that Motronic meant Motronic. Not to BMW, who call any engine control unit Motronic, regardless of whether they are violating Bosch’s trademark rights or not… See above.

I am a card-carrying K-Jetronic girl. When I first discovered K-Jet-E in my 1982 VW Rabbit Convertible, I leaned back in awe and remarked to myself that this is how I would do fuel injection if I had to: I would take apart a carburettor and distribute its parts liberally around the engine bay, making sure that each had its place and did not interfere with the others, all being individually adjustable and controllable (einstellbar und kontrollierbar, auf Deutsch). Just like K-Jet. I regard K-Jet as one of the peaks of elegant engineering design, and certainly one of the coolest systems to ever leave the halls of Robert Bosch Gmbh. It is also simple and easy to work with, provided you understand the basics of air/fuel ratios and a few other odds and ends about ICEs, of course.

I can’t say the same for Motronic, Bosch’s “modern” EFI control system. I’ve been watching a weird problem on my bike lately, and I’ve tracked it down to what looks like a bad hack job over in the Motronic design group. Not content with just supplying a modern, 2004 version of Motronic, it appears that Bosch decided to crib together the lousy parts of Motronic (signals taken from only half of the system), an interesting part of K-Jet (running the whole thing off the coil sense), and who knows what from Digifant.

The problem manifests itself as a flat 500rpm lift in the tach signal when it rains. Being Motronic, the tach signal is fed from the coil sense, but only from one of the two coils. The Rotax engine is known for some assorted issues (other than being a bullet-proof, workhorse, dinosaur of a fuel-efficient and otherwise great motor), one of which is pretty serious surging. Well…. imagine that. When your injector circuit is being driven by a feedback loop from half of the coil circuit, and voltage is building up due to phantom capacitance somewhere, yeah, the poor thing is going to surge like crazy.

So, I’ll be spending my weekend working on the bike with the only tool you need on a Motronic machine: my DVM. This is not what “working on the (insert ICE-equipped vehicle)” is supposed to mean, Mr Bosch…..