Automotive

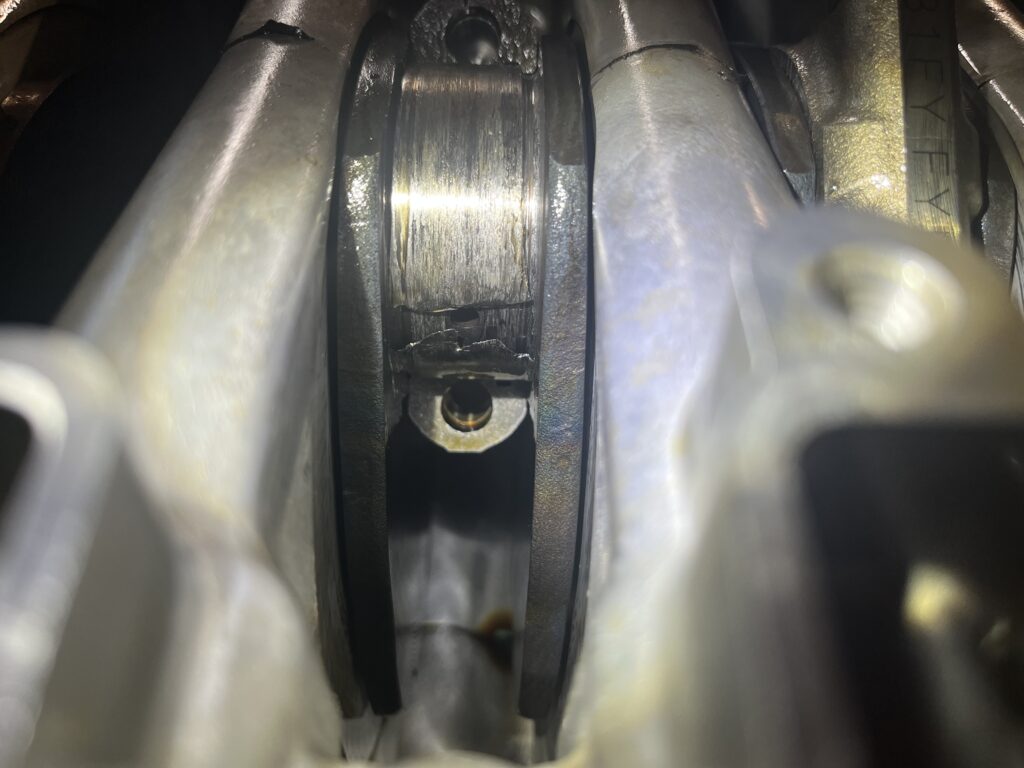
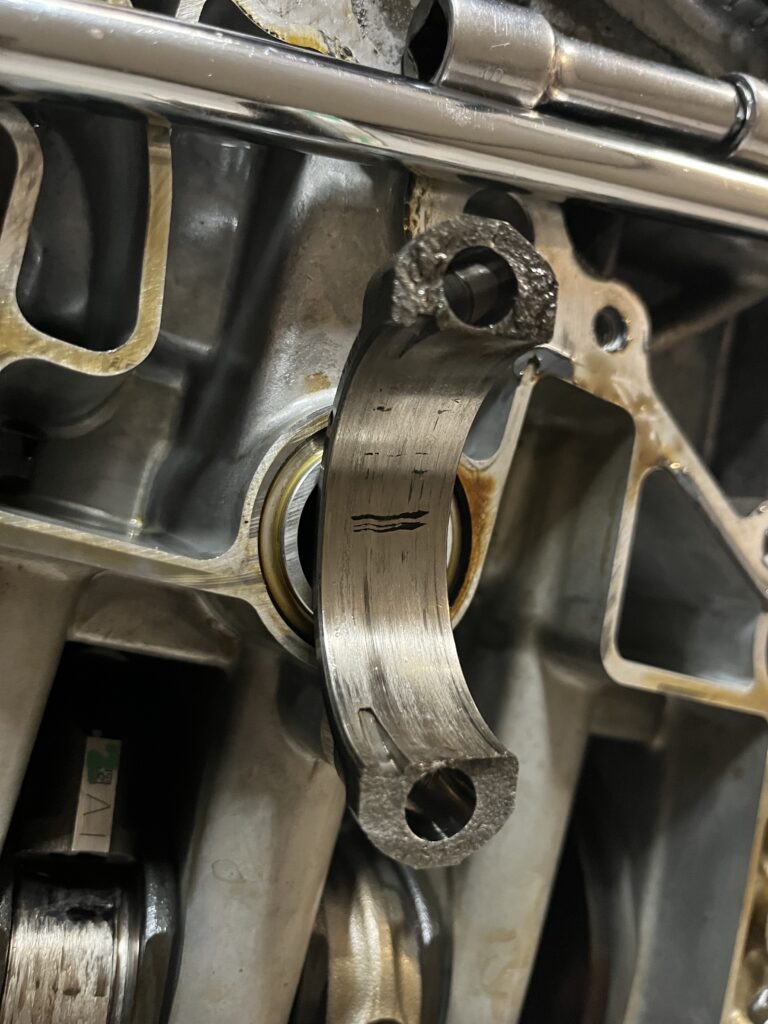
This is what a spun bearing looks like. The bearing has slipped in the gap and worn itself to nothing. Damage to crank and to big end bore.

Honestly, this is really bad, and it’s kind of a surprise that the rod did not try to move about the cabin. Props to Subaru for having an engine that did not explode.

Tomorrow, will start on heads to check the cam journals. Then, decision time.

After 111502 miles and 40+ track days, the FA20 in the BRZ had it. No complaints here. I was coming off at 3 at Grattan after the last session of the day and about 100 feet from the paddock, new, unhappy noises happened. Thankfully, amongst the Summer Track Days crew of regulars, an unneeded trailer was available and my blueberry was hauled home safely. Otherwise, it was a really good day at Grattan, steadily dropping lap times and improving my line. The new pavement is interesting, and there are some elevation changes to the track that I was surprised by. But a good day at Grattan is better than the best day at most other tracks, so there is that.

I have a lot of mixed feelings about the failure. I got more than 100K out of the engine, which is good considering some of the stories I have heard about this engine. On the plus side, it failed in a perfectly safe place where I could stop it before it ate the crank, and surrounded by friends who aren’t strangers to racecars doing racecar things.

Getting to the oil pan was no easy feat – it’s captive to the exhaust manifold so that had to come out. That was not a particularly fun job and of course involved a Sawzall (last spring bolt, nothing serious). The oil pan is now out and it’s not a happy place. Lots of glitter, made of the souls of big end bearings. And before you say “RTV in the pickup”, no, there was no RTV in the pickup to speak of.

I am spending the July 4th weekend having at it, and am deep into the engine bay with some help from my older son. I have to kick his latest 4AGE build off the engine stand to put this one on it. Poor kid.

I will hopefully have it out by Sunday night and then can spend next week tearing it down to find the bad bearing. If the crank is ok, I will button it all back up and it will be back to doing FA20 things. If there is cylinder damage, well, I have a friend who is a bad influence and thinks I should put an FA24 in it….

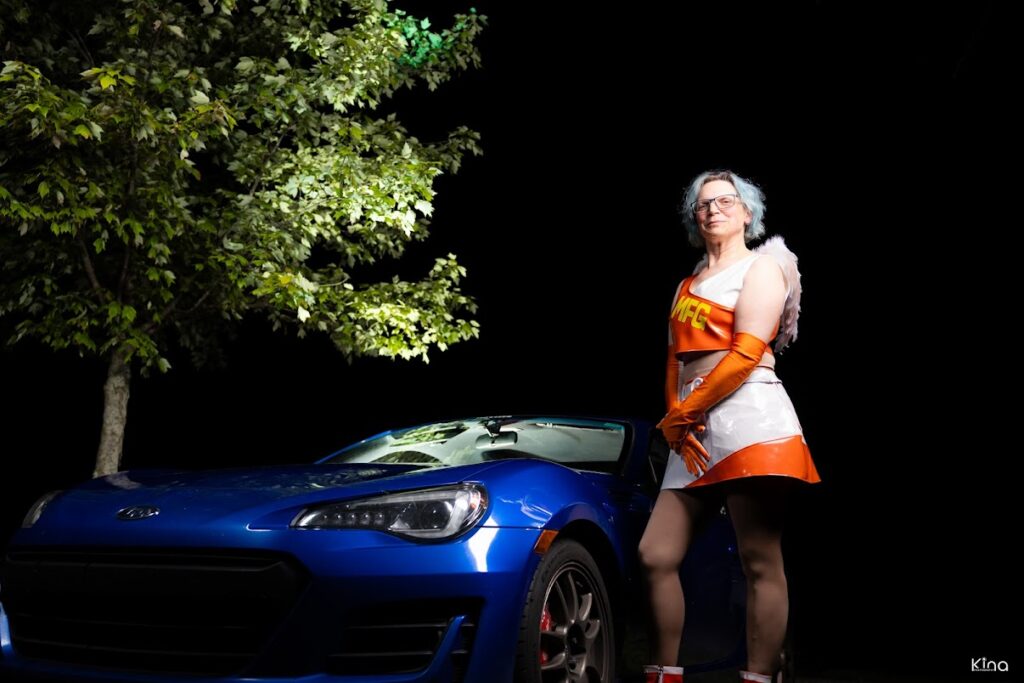
This time, it’s an MF Ghost Angel. I used the Tokyo Auto Salon version because I’m not accepting enough of my own body to wear a mini-bikini bottom. So skirt it is.
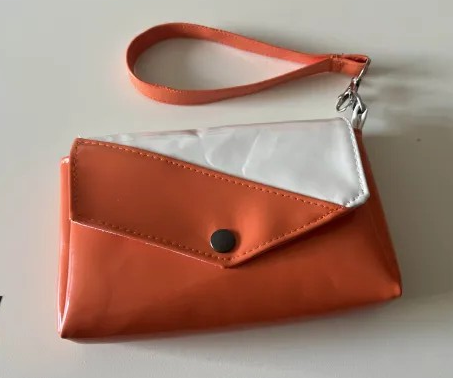
Teaser pic of my small purse accessory. Two phones and a small wallet. Also, I hate making gloves. They are awful. But I am getting better at them.

A few people asked about this one, so here goes. More pics to come.

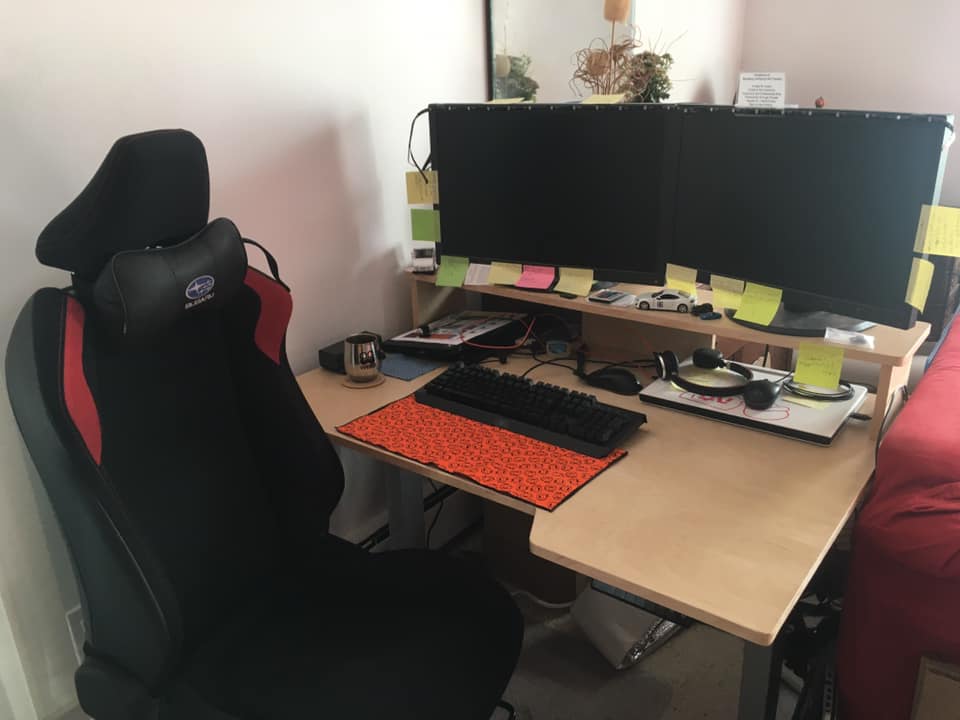
I picked up a pair of FRS seats a while ago and decided that as I actually had no real use for them, I would make a desk chair for my home office space. Combined with my new desk, this was a serious win.

New desk with FRS seat office chair

Materials included one 28″ desk chair base – https://www.amazon.com/Hihone-Replacement-Cylinder-Casters-Adjustable/dp/B08B7SVWCH is the one I used. You might need a shorter one, but I would not get a smaller diameter one. These seats are heavy, due to being automotive grade. I also used a 4′ section of steel L channel in 2″x1.5″. I cut this into two pieces that span the underside of the seat. I used 8 1-inch 1/4″ bolts, two 2-inch 1/4″ bolts, washers everywhere, and about 24 1/4″ nuts.

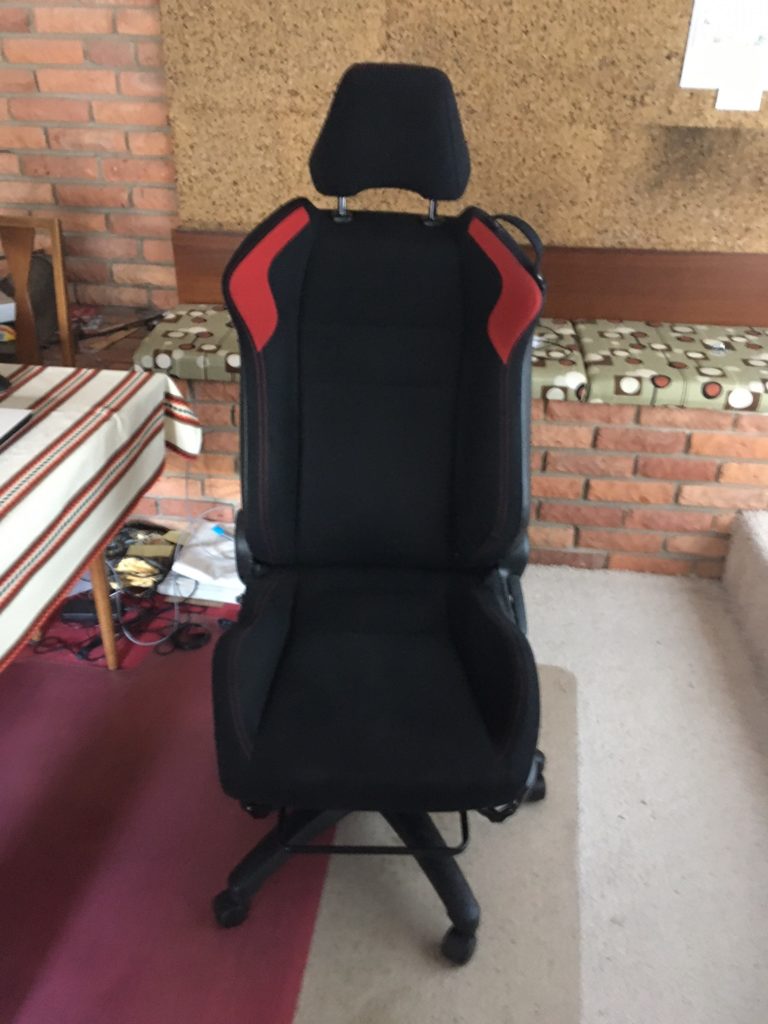
The biggest challenge with this project is getting the seat pitch correct. It’s a car seat from a sports car, so the seat base is pitched back qutie a bit. This does not work for an office chair. In addition, the seat mount on the seat base is also pitched back. To correct this, you have to suspend the front of the chair. (Pic coming soon)

Just the chair

If you use the seat rails (I did), you will have to drill one hole on each side to line up with the front holes in the chair mount. Take one of the pieces of L channel and mount it to the rear holes on the seat rails. Measure forward on the chair base to get the correct offset for the front mounting bar and drill the appropriate holes in the seat rails. Mount the other piece of L channel to those holes. Don’t tighten anything down hard yet.

The hole you drill

You can remove the seat rails and just mount the actual seat if you are on the shorter side, but at 5’6″, I did not have to do this. I still have some down-space on the gas shock, too.

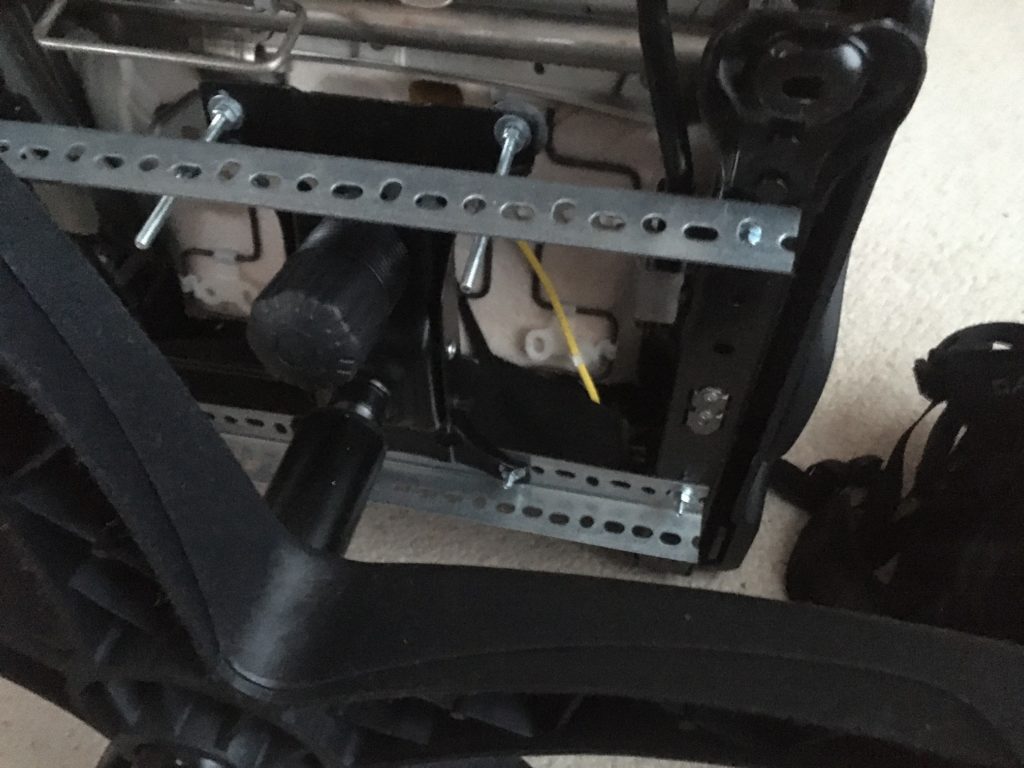
Now for the fun. Tip the seat over. I got a kitchen chair and put it upside-down on that to make it easier to work on. Take the chair mount off the chair base (it lifts off) and insert it under the front L channel, and over the rear L Channel. Bolt the back rail to the holes on the back side of the chair mount. Here is where it gets interesting – put the longer bolts into the front holes of the seat base and add washers and nuts Do not snug these up, they need to move around a bunch. There is enough flexibility in the steel to allow you to wiggle things around. I used 3″ bolts here, but 2″ or 2.5″ are more than enough and easier to work with. Add two more nuts and a washer and wiggle them into the front L channel. NOW, tighten them up at the chair base mount.

Better view of rear setup

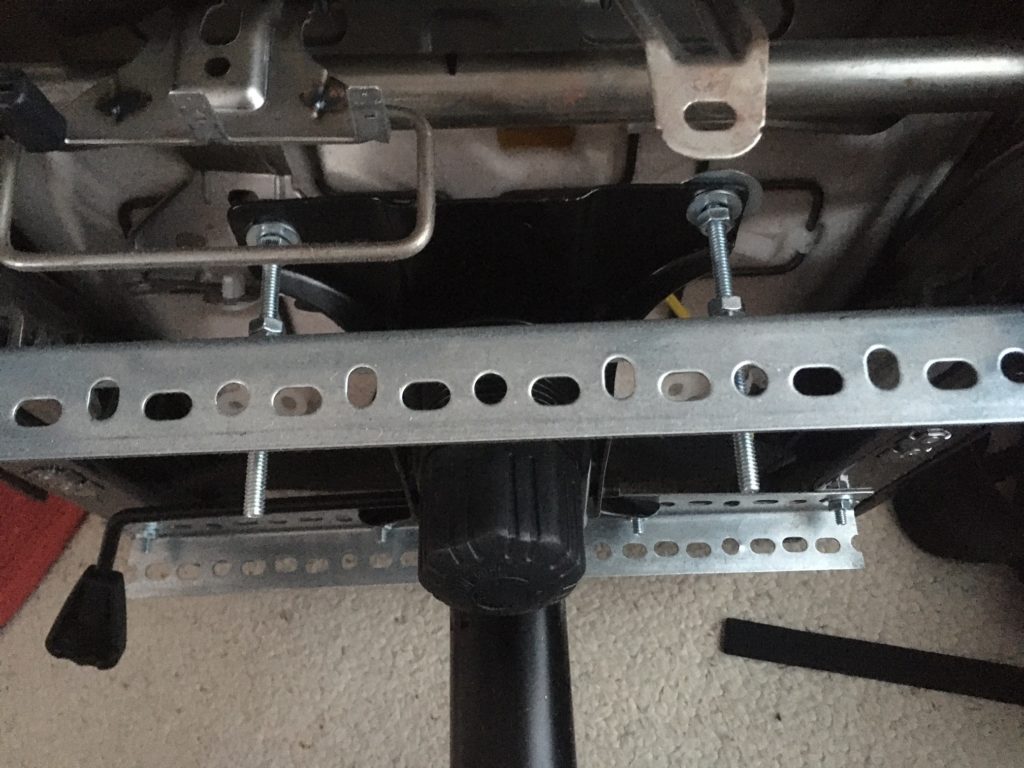
At this point, you are ready to set your seat pitch. Add a washer and nut to the stubs of the long bolts sticking through the front L channel. Flip the whole mess over and get your level out. Adjust the height of the front of the seat so it is comfortable and then tighten everything up. Use the jam nuts (the double nuts on “top” of the front L channel) to hold the position.

Suspension adjustment for seat pitch

There you go. Enjoy your new desk chair. Mine is awesome!

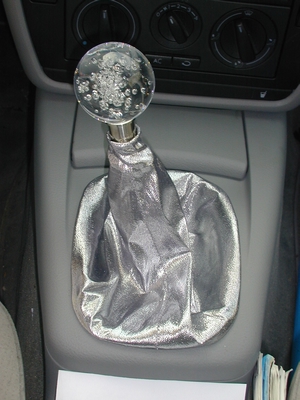
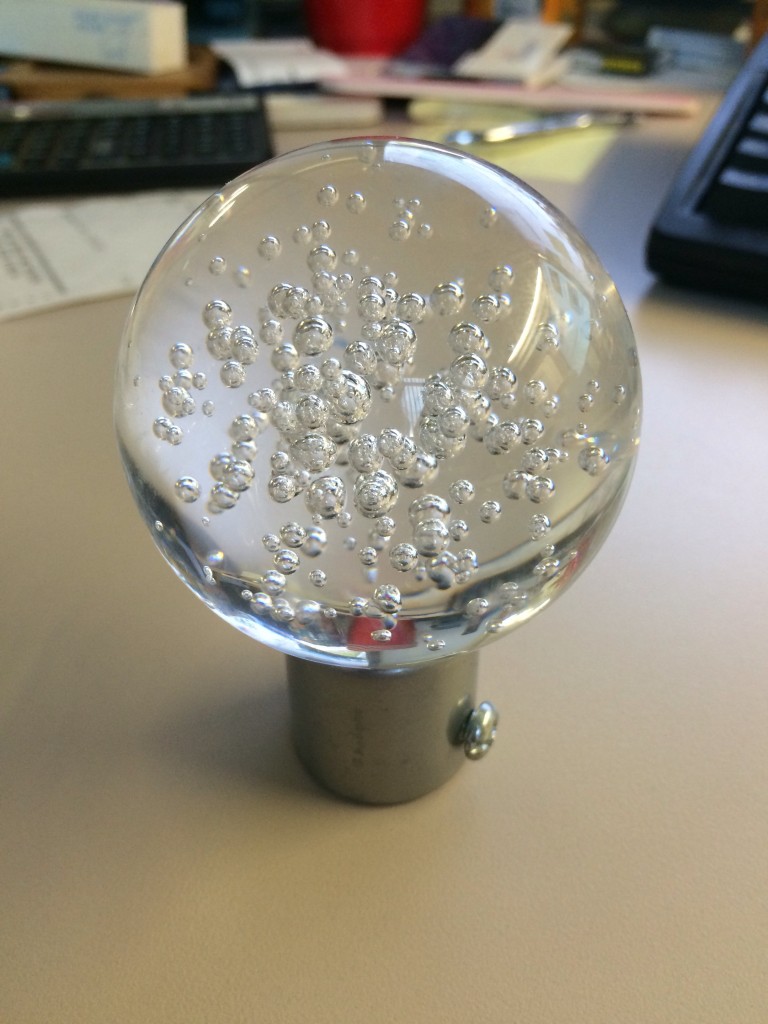
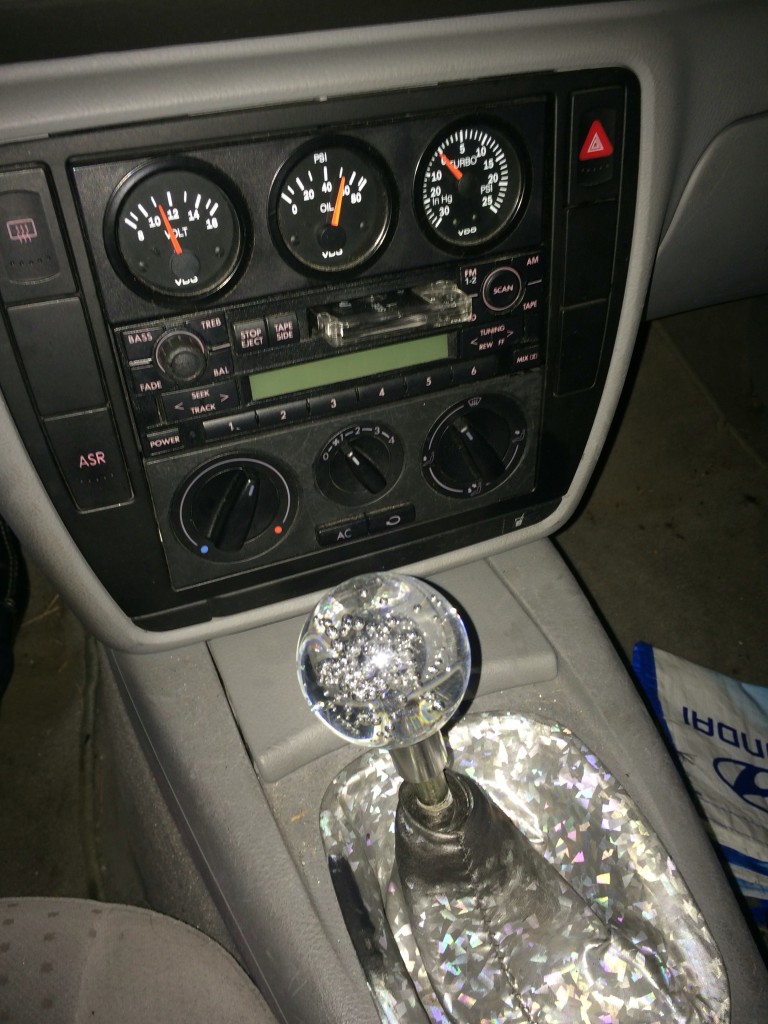
It’s an IKEA curtain rod end. I think it’s called Lystra. It was a joke, one of those April Fool’s things we used to do on ClubB5.com back in the day. This had to be back in like 2001-2. I remember taking pics on the AC Expressway. I had pulled the knob and found that the shifter shaft was hollow. Oh yes. The wheels were turning.

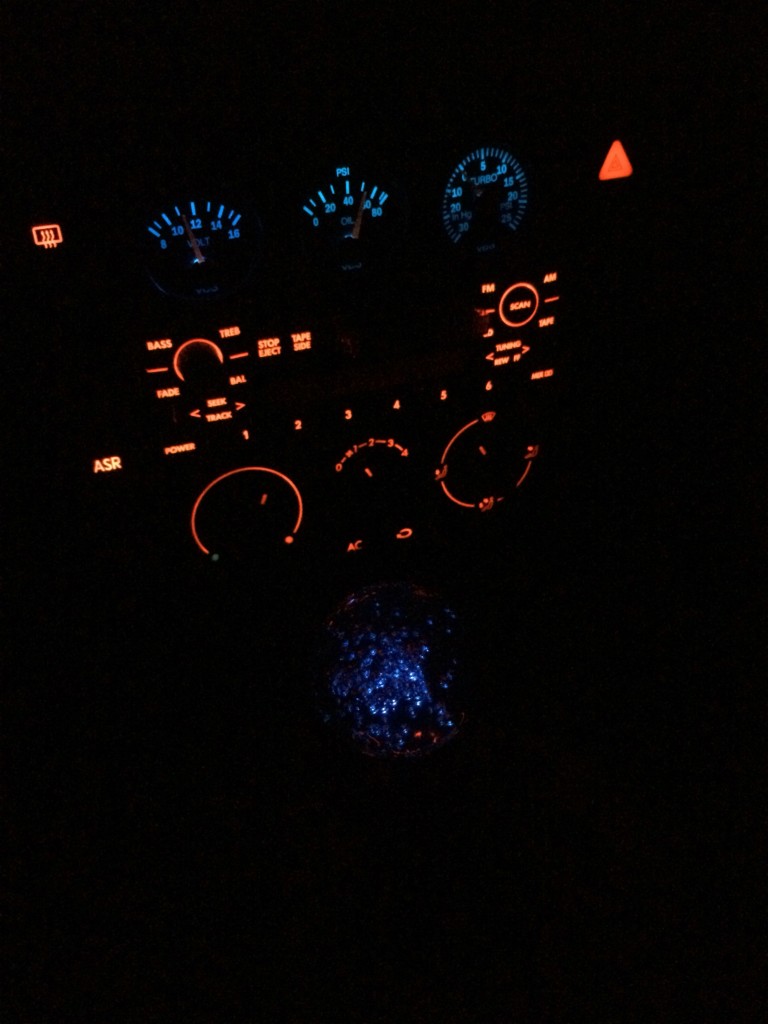
My dad machined the stainless base for me. It took a couple of tries to get it all right. Including the electronics. I blew a few LEDs getting it sorted, but eventually got it wired into the dash dimmer circuit, because that is what I do. It also took a while to find the correct color of LED, these are rather violet, not the traditional teal that was common back then.

Blue Bubble Ball

So if you ever want to blame someone for a Pep Boys mod, well, now you know. It was a joke. We had a laugh. I still put it on once in a while when I light up the roof. May as well enjoy the old beast, right?

OEM+

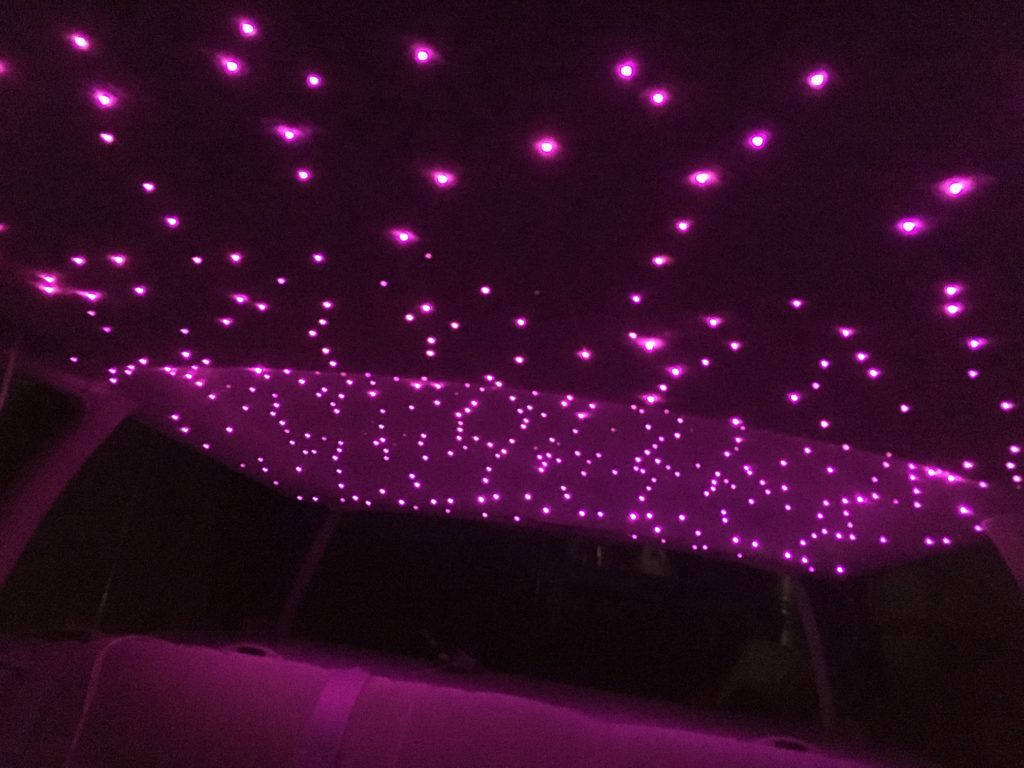
The pinnacle of early 2000s VW modding – poaching partsbin bits for upgrades. This is the OEM taxi dome light switch, wired into the dash dimmer and driving the fibre optic headliner off rail power. It’s my dream install and I am completely delighted. The switch arrived today thanks to a fellow B5er who reduced his hoard of parts by one switch.

There was a request to address the fibre optic headliner.

So. I redid the headliner in the B5. With custom-printed fabric from Contrando. I did a sticker bomb pattern of my girlie logo. It’s awesome.

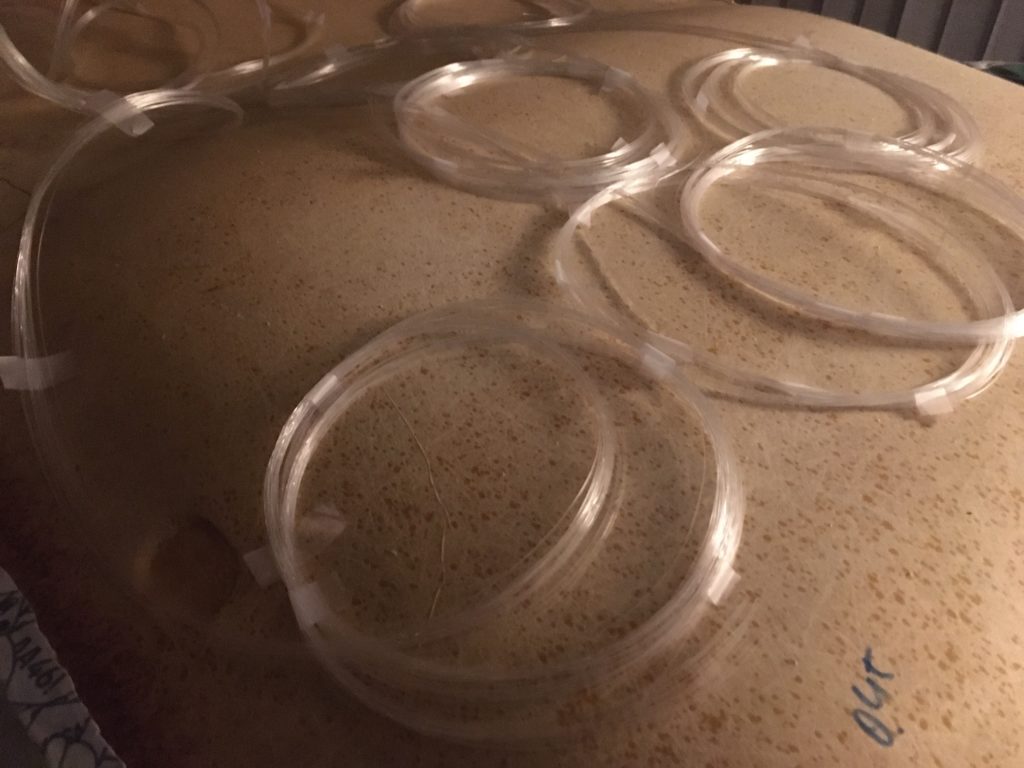
I purchased a 14W light engine from amazon Chinapost. It was $45 with 250 3m strands of roughly 1mm optical fibre. I also purchased an extra 100m of fibre.

I did the headliner like normal with lots of pattern matching so that the sunroof cover lines up when it is closed. This was not that hard. There was a lot of spray adhesive and high temp hot glue involved. See above.

Then… the fibres. There was much hemming and hawing about how to do the fibre insertion. I originally wanted to do a random pattern, but then realized that that would be pretty hard to accomplish with basically acres of headliner. So, I opted to put a fibre in each complete eyeball in the pattern. Basically light up pupils. The first 250 fibres took me about two weeks to get in. The next 250 took me another two weeks. The last hundred took me about a morning because I wanted that **** done.

The process I used was…

Poke a hole through the headliner in the desired location using an upholstery needle. This left a big enough hole that I could find it later, and almost big enough to get the fiber through. The headliner is a lot thicker than I realized, up to 1/2″ in places. Once I had all of the eyes located and poked through, then I started threading the fibre.

I did have to figure out where to stick the light engine as there is a sunroof in the car and that limits space a bit. I put it near the C pillar so it was easy to peek at if needed. All fibres ran to this location.

Threading the fibres required me to insert the needle and then catch the end of the fibre with it. Then push the fibre through allowing it to follow the needle. This was a lot of work and took me a bit to get a method down. Once I got it going, it was better. I needed a lot of ambient light to see the fibre ends. I ran the entire 250 fibre bundle first before moving to the next step. Then I cut the fibres and hot-glued them on the back side of the headliner. The hot glue melts at a temperature close to that of PMMA so I had to hold the fibres in position until the glue solidified a bit. This was about ten seconds.

I reserved all of the cut ends as they varied in length from 1 foot to about 8 feet. I reused all of these, finding the flat ends to face the light engine. Then, I started cutting into my coil of PMMA. In the end, I believe it was 618 individual fibres.

Once I had the fibres in, I had to equalize the lengths and get them into the coupler. This was difficult and I have no pics.

The last thing I did was glue down a piece of nylon fabric over the middle of it to protect the strands in the middle from the sunroof assembly. Again, no pic because doggone it, at that point, I wanted it done and in.

It is utterly amazing. I cannot describe how happy I am with it.

I found this oldie when replying to a BRZ thread. Original date was 15FEB2006.

I got the email from Volkswagen last evening: I would finally find out what my fast was about. I clicked in anticipation, who knows, maybe my fast would be special, maybe I would actually get a fast. Whatever, I was off for the e-ride.

My fast looked suspiciously similar to the fast I had already seen in the forums of TCL, but whatever. It was cute, if a little bit pudgy. Certainly more pudgy than the fast I have out in my garage, although it is certainly faster than the fast in my garage. That fast is not very fast, although it is very noisy and seems to think it can talk to me. I had the sneaking suspicion that my fast looked just like everyone else’s fast. Bummer.

I worked my way through the car configurator to see how fast I was going to go. I have to admit, the configurator was nicely done. Keeping tabs on the cost, advising when an option was part of a package, showing the parts on the vehicle, and good informational blurbs about each option. Very well done. I was particularly interested in the “joy ride” selection. I knew I was off for an e-ride, but an e-joyride? What the hell is that? I clicked. A clipped, European female voice advised me that the joyride would be handled by an expert driver on a closed course. It was right there that I went wrong. My wrongness would become readily apparent in mere moments.

At the words “expert driver on closed course” I made a critical error. My mind drifted. I let myself imagine who I would want my “expert driver” to be. I drifted further, would he be better looking than Schumi? More confident than Rubens? Would he be the racing equivalent of Fabio? I admit it – the sexy female voice told me I would get an expert driver. No crime in hoping for a good looking one. If I’m going to take a fantasy e-joyride with a guy, I want it to be nice, and good looks under the helmet will be a definite plus.

Then Helga popped up.

Uh, ok.

A porn star in a nurse’s uniform with a Cinnabon on her head is now on my screen. What does this have to do with joyriding? I have heels like that, I sure as hell don’t wear them when I’m racing. I don’t generally associate wearing them with driving at all. Little problem with ankle extension on the clutch foot, you see.

I want Hans, not Helga. And now she’s a cloying kitten, teasing the ******* in the rice rocket in the next lane over. This is embarrassing. Car chicks do not behave like that. We wear our clothes when we take your pink slip, thank you.

<detour>
It would not be possible to abuse Mitsubishi’s j-cool concept more heavily than the creative people did in this bit. Stereotype takes on new meaning after seeing that car. Yellow may be fast, and stickers may mean horsepower, but daaaaaayyy-um! That thing had it all! And the wigger that was driving it? Please! The Icy-Hot Stunnas could not have done a better job of creating that train wreck. Did I see diamonds on those teeth? Holy crap. If I wasn’t laughing out loud at Helga, I’m laughing out loud at this fool.
</detour>

So I watch while Helga drops the flags. The cars launch. Wait a minute, now she’s back in the car? Um, story board foul-up. It’s a bit hard to get around a launching vehicle and into the passenger seat if you are the starter. Wait, it’s supposed to be a fantasy e-joyride. I suppose anything can happen. It’s also a straight quarter, not exactly what I would do with a GTI – it’s supposed to be a You-Ro-Pee-N car with that fancy handling, right? What kind of handling is required for a straight quarter mile? More racing stereotypes leave me feeling cold.

With the rice rocket slain, Helga drops me off at the starting line and speeds off with those leg-breaking heels. I guess I’m supposed to be in some state of arousal at this point, but I am not. I am laughing. If humor was the point, I’m getting it. I am emailing this silly bit of teenage-boy marketing to my car-girlfriends so they can laugh at it, too. And they will. They will laugh and email it to their car-girlfriends, and so on. We will tell Helga jokes. Poor Helga. And we will snicker about this gorgeous GTI for a long time. We will probably not buy so many of them, because Volkswagen has told us where we stand in relation to it. We don’t.

You see, we’re not the target market. We’re girls.