My old laser pointer alignment trick was a big hit among my suspension tech friends, so I wanted to try a new tool and see if it ups the game.
Some time ago, I acquired a nice Bosch siting laser. This is used to determine if ground is level. You set it up in one location and measure down from the horizontal line to determine relative height of land, floor, whatever. You can also measure off a vertical line, and with a tape out from the laser pole, you can triangulate location.
The siting laser alignment process requires a siting laser, some Post-It notes, a plumb bob, a pen, a notepad (or use one of those Post-It notes), three measuring tapes (or one and some masking tape and a marker to mark your close measurement positions), and a scientific calculator (or access to one online).
The basic setup remains nearly identical to the old string alignment trick. In this variation, you set up the siting laser to throw a line out. Like the laser pointer trick, you can use your garage door as a target. Park so that your axles are about eight feet out from the door.
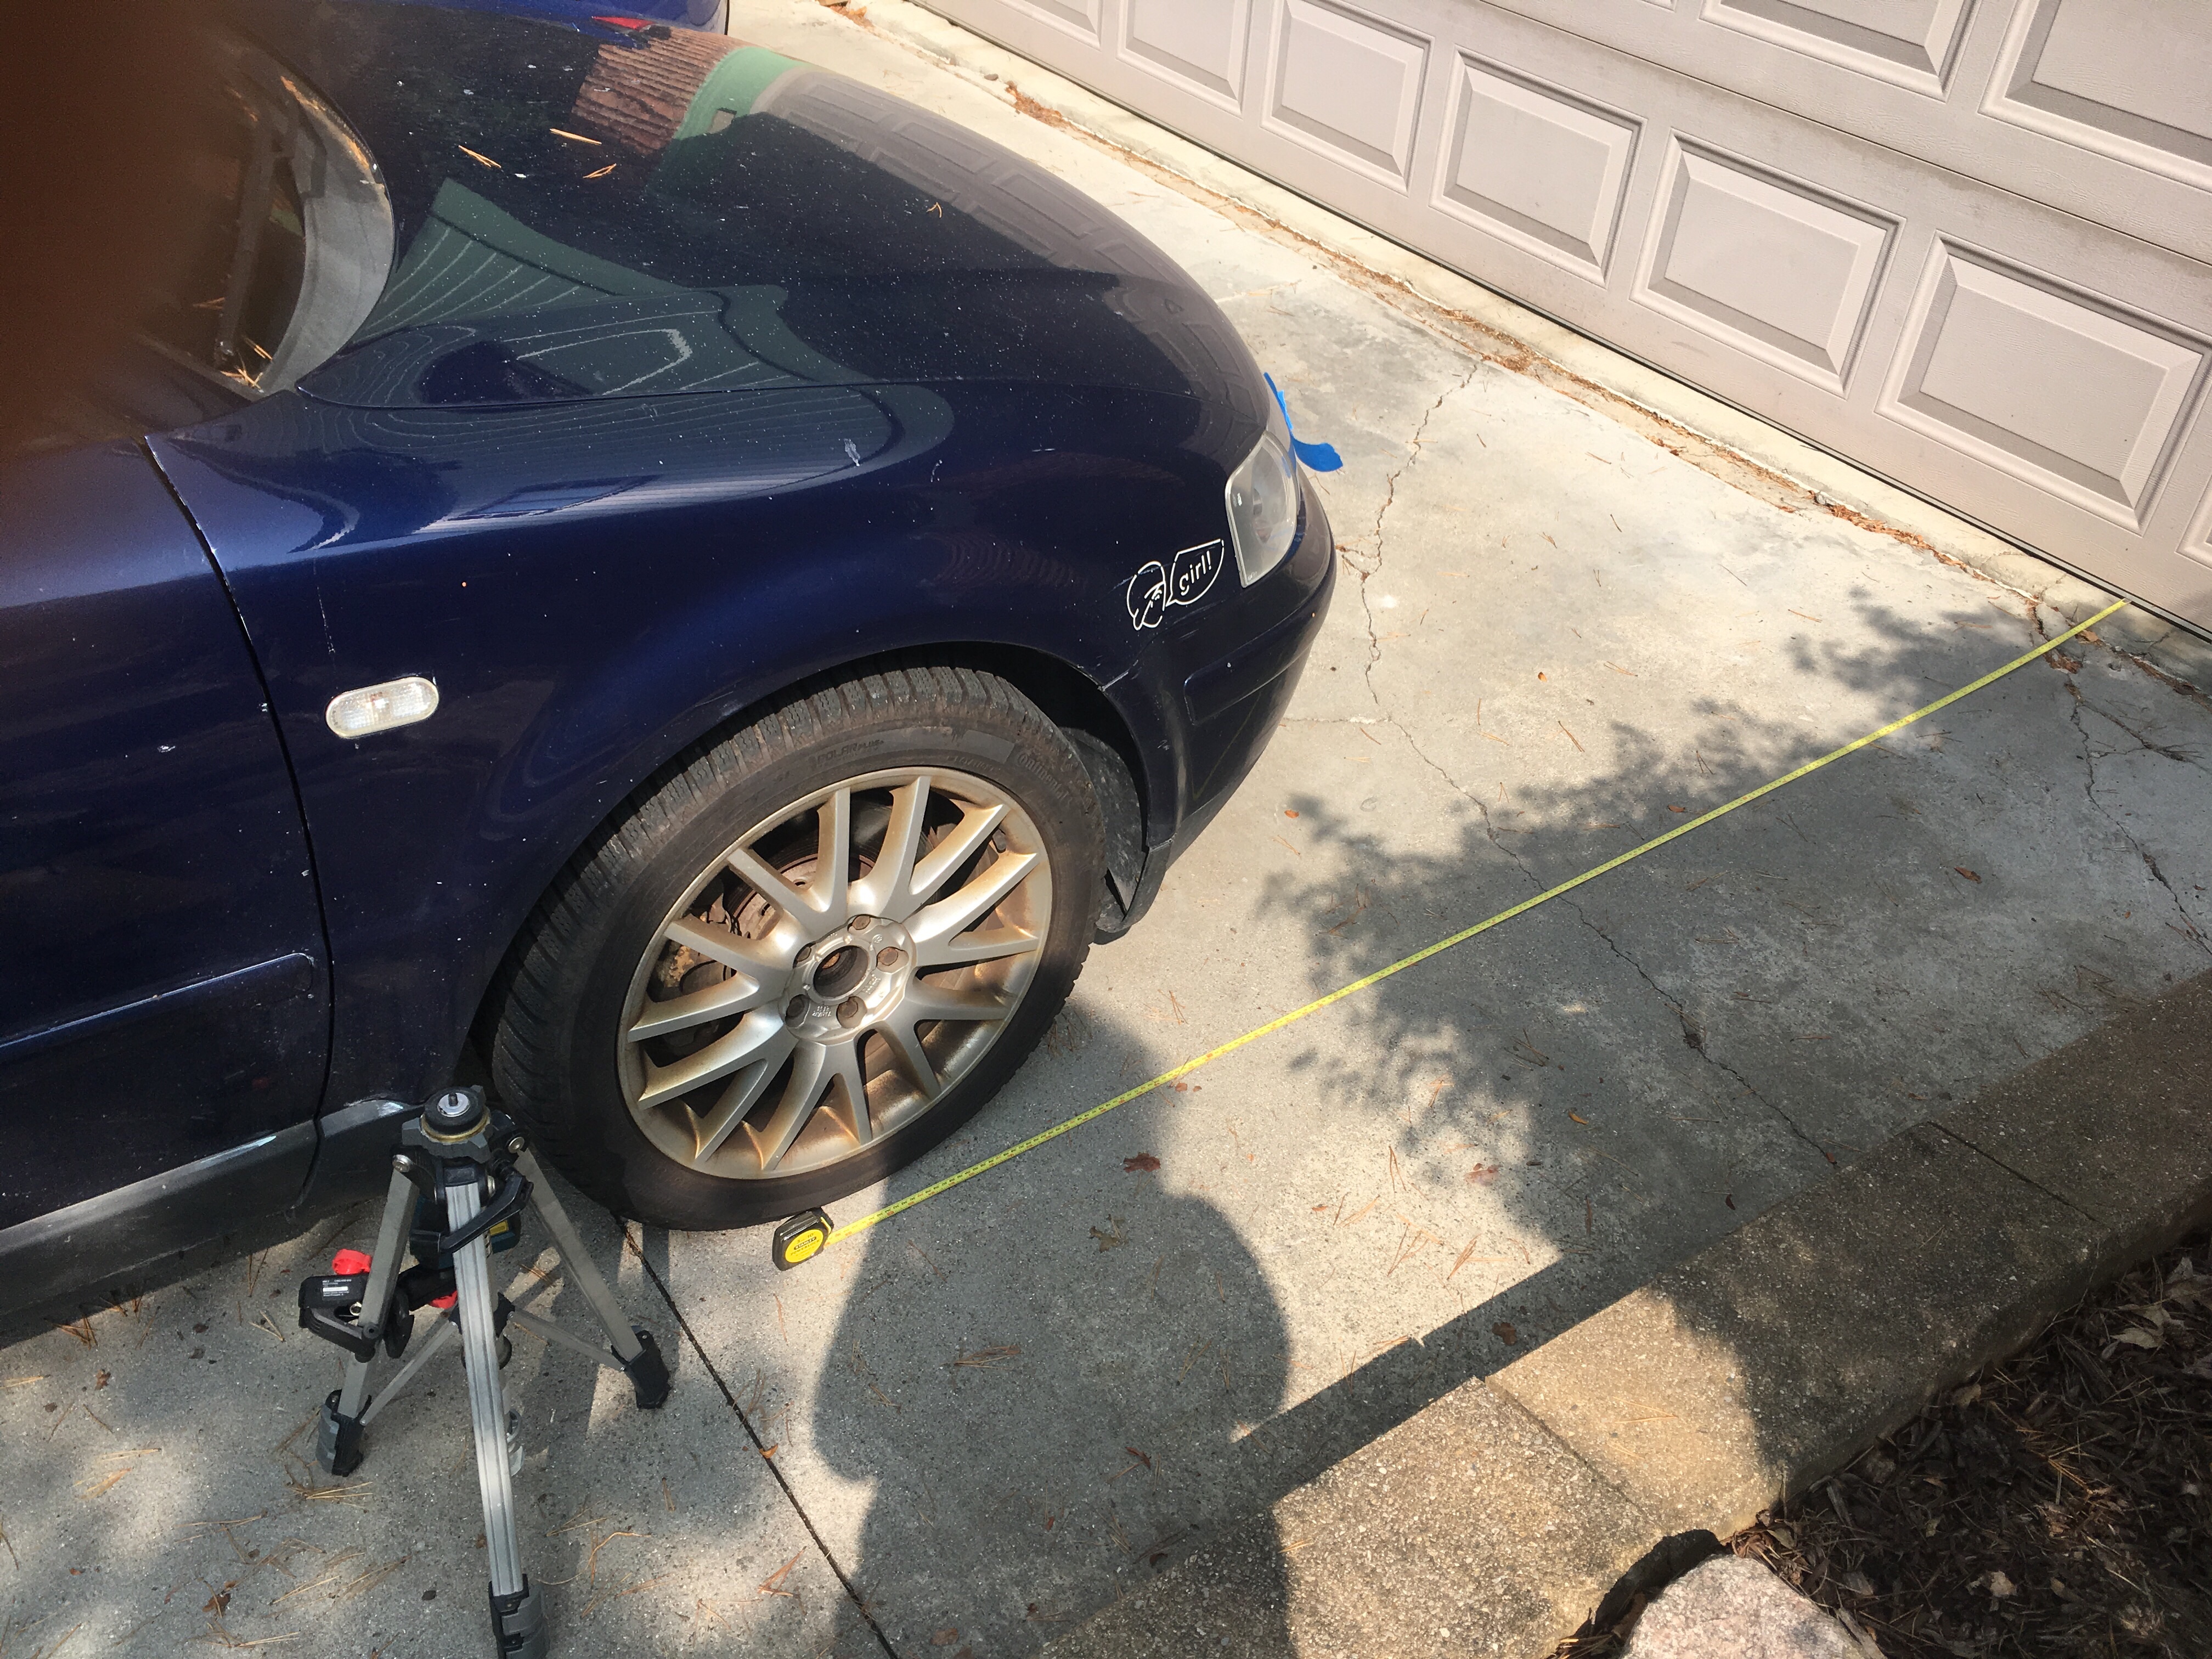
The siting laser is set up near the rear of the wheel. I found that it is really important to locate the laser so that the vertical is grazing the wheel surface. Any laser that throws a line will throw it in a way that can bend around a bit, so by using the vertical to locate the instrument, you can move it repeatedly and still be getting the same measurement.
Now, just like a regular string alignment, you set up your tape measures so that their zeros are at the center of the hub or the forward point on the tyre. Your choice. Note the distance to the garage door surface on your notepad. Locate a point about 24″ out and position a horizontal tape that is wider than your car. If you don’t have an endless supply of tape measure, put down a piece of tape that you can mark with your position from the next step. Drop your plumb bob, watching to see when the string crosses the laser beam. Take your first measurement of distance from the axle and the position on the side-to-side tape here and note the values on a notepad. Then head to the garage door and plop a Post-It note where the laser is visible (hard to see in direct sun, but it’s there) and make a mark where the laser beam ends. Label this mark A. Note that the mark here is off because I remembered to take the pic after the alignment was complete, not before. dur.
Now, relocate the laser to the other side and repeat. Same label, too. Measure the distance between the marks on the garage door and the distance from the door marks to your first mark. Now, measure the distance between the marks on the garage door.

Once you have the four measurements, the math is the same basic trig as the string alignment. You need to know the distance between your close mark and the garage door (should be about six feet or 72 inches) and the two measurements from side to side. Subtract the close measurement from the door measurement. If it is negative, you have toe-in, if it is positive, you have toe-out. Take that value and divide it by the distance between the close and door measurements and run an inverse tangent (tan-1) on a calculator. This will give you the degrees of toe in decimal. Once you know that, you can figure out where to go to set it.
Once you are done, repeat the process. Note that you will have to check both sides to get the fnal numbers. Because you labeled your first marks, you will know what is what.
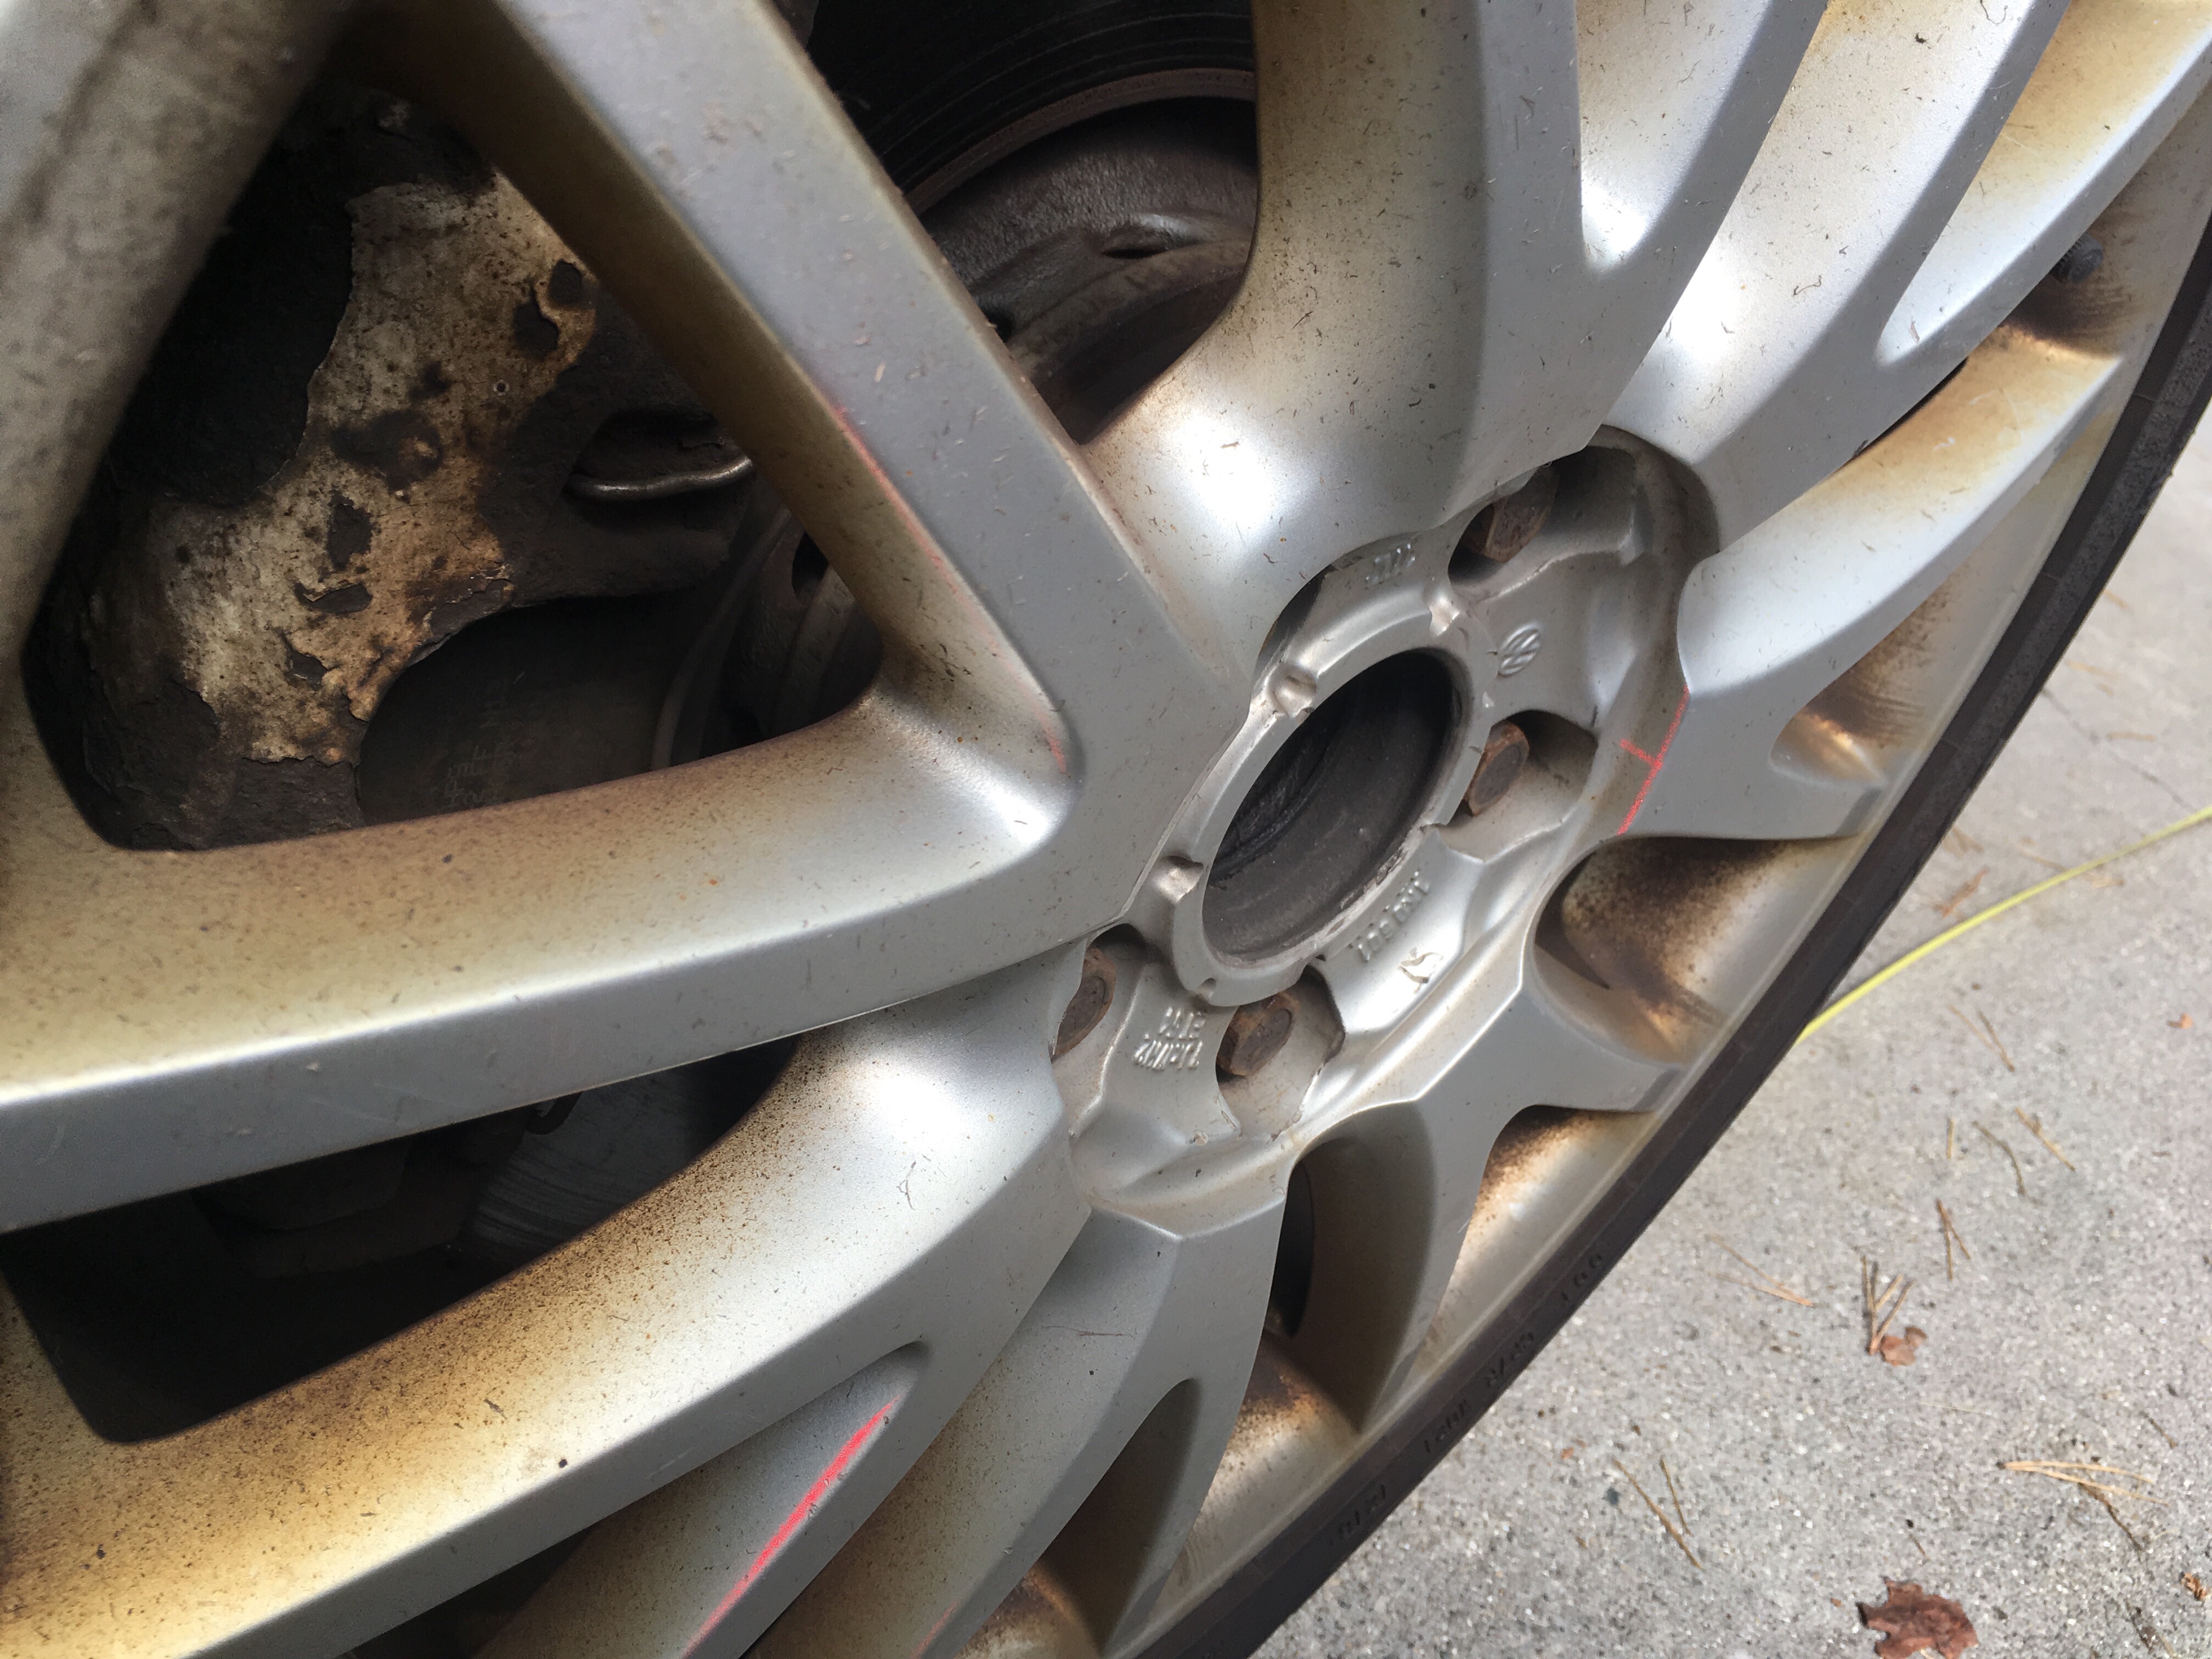
What I didn’t do, mostly because it is nigh impossible without jacking this car, is a camber adjustment. However, the vertical beam of the laser makes camber measurement very easy, and if you have camber plates up top, super easy to adjust. You will need a really fine caliper to do the measurement, though.
To measure camber, set the laser out from the wheel a bit, about an inch or two. Positioning is critical, again, so you can repeat measurements. The whole thing benefits from having a level surface, too. Otherwise you will find that all of your camber is on one side of the vehicle, which is probably entirely false. I recommend switching to metric here, or at least using a caliper for the distance out values.
Check the distance from the outermost point of the wheel/tyre at the front and back of the wheel edge and adjust the laser until they are even. Using the horizontal beam, find the tallest and shortest points on the wheel edge and mark them. Now, measure to the laser line at the top and bottom of the wheel where you marked. Also measure the exact distance between the points you took the first two measurements. If you can access a hard point on the suspension, take a measurement to the laser vertical there, also. Do not use a spring, use a shock shaft/tube, the spindle upper, or something that is also equally spaced on both sides. This will enable you to split the camber as you will now know exactly how far off vertical you are from side to side.
The math is the same, top minus bottom (adjust for off-vertical here), divided by diameter of wheel and inverse tan. Adjust away.
This is a great way to do a one-person laser alignment. It’s a real alignment, and you used a laser. It’s primary value is that you reduce the number of things you need two hands or a second person to do.